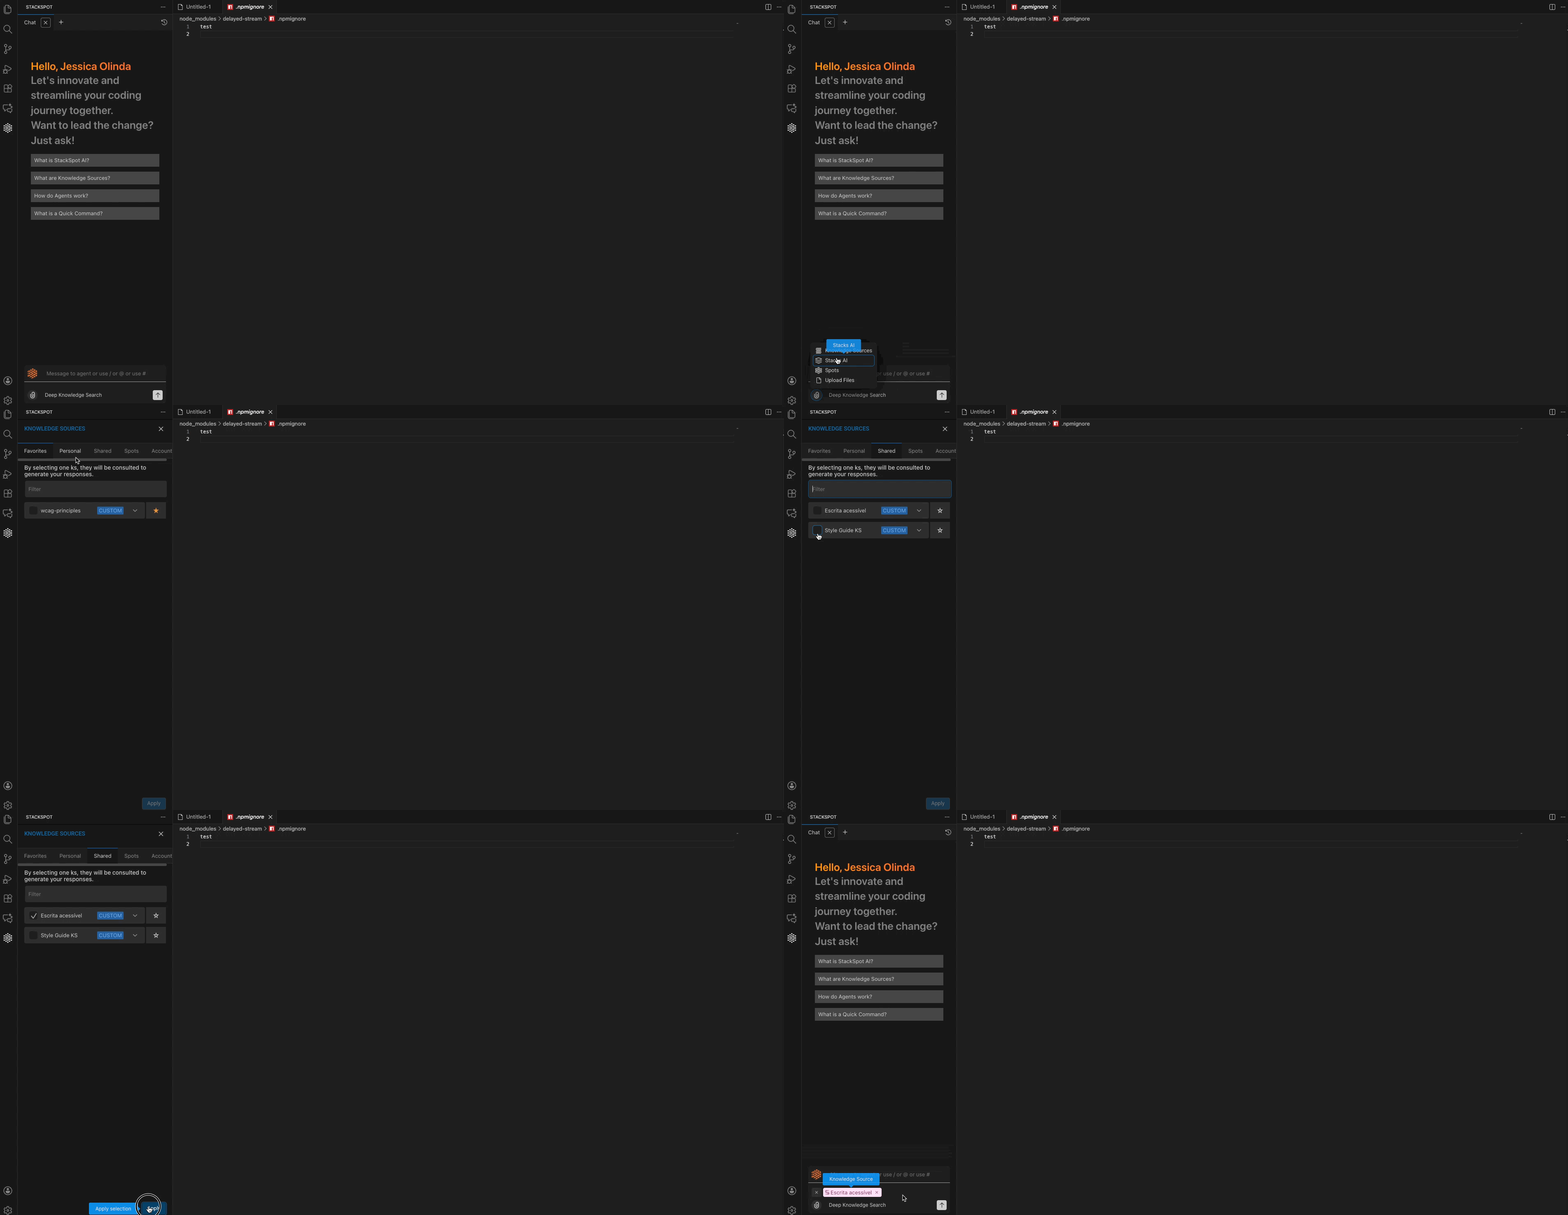
Create, Share & Use Personal Content
StackSpot AI offers a flexible and powerful way to personalize your development environment. It allows you to create, manage and share your Stacks AI, Knowledge Sources, Agents, and Quick Commands. This personalized content is directly accessible within your IDE through the StackSpot AI portal and extension, providing a tailored development experience.
Personal Permissions
| Resource | Action | Description |
|---|---|---|
| Stack AI | create, update, delete | Management of Stack AI content in the Personal context. In the StackSpot AI Platform, you can create, update (change the name, description, and settings of the AI Stack), and delete a Personal Stack AI. |
| Remote and IDE Quick Command | create, update, delete, execute | Management of Quick Commands IDE or a Remote Quick command content in the Personal context. In the StackSpot AI Platform, you can create, update (change the name, description, content, and settings), and delete a Personal Quick Commands IDE or Remote Quick Command. |
| Knowledge Source | create, update, delete | Management of Knowledge Source content in the Personal context. In the StackSpot AI Platform, you can create and update (change the name, description, content, and settings) and delete Personal Knowledge Source. |
| Agent | create, update, delete | Management of Agents content in the Personal context. In the StackSpot AI Platform, you can create and update (change the name, description, content, and settings) and delete Agents. |
Creating Personal Content
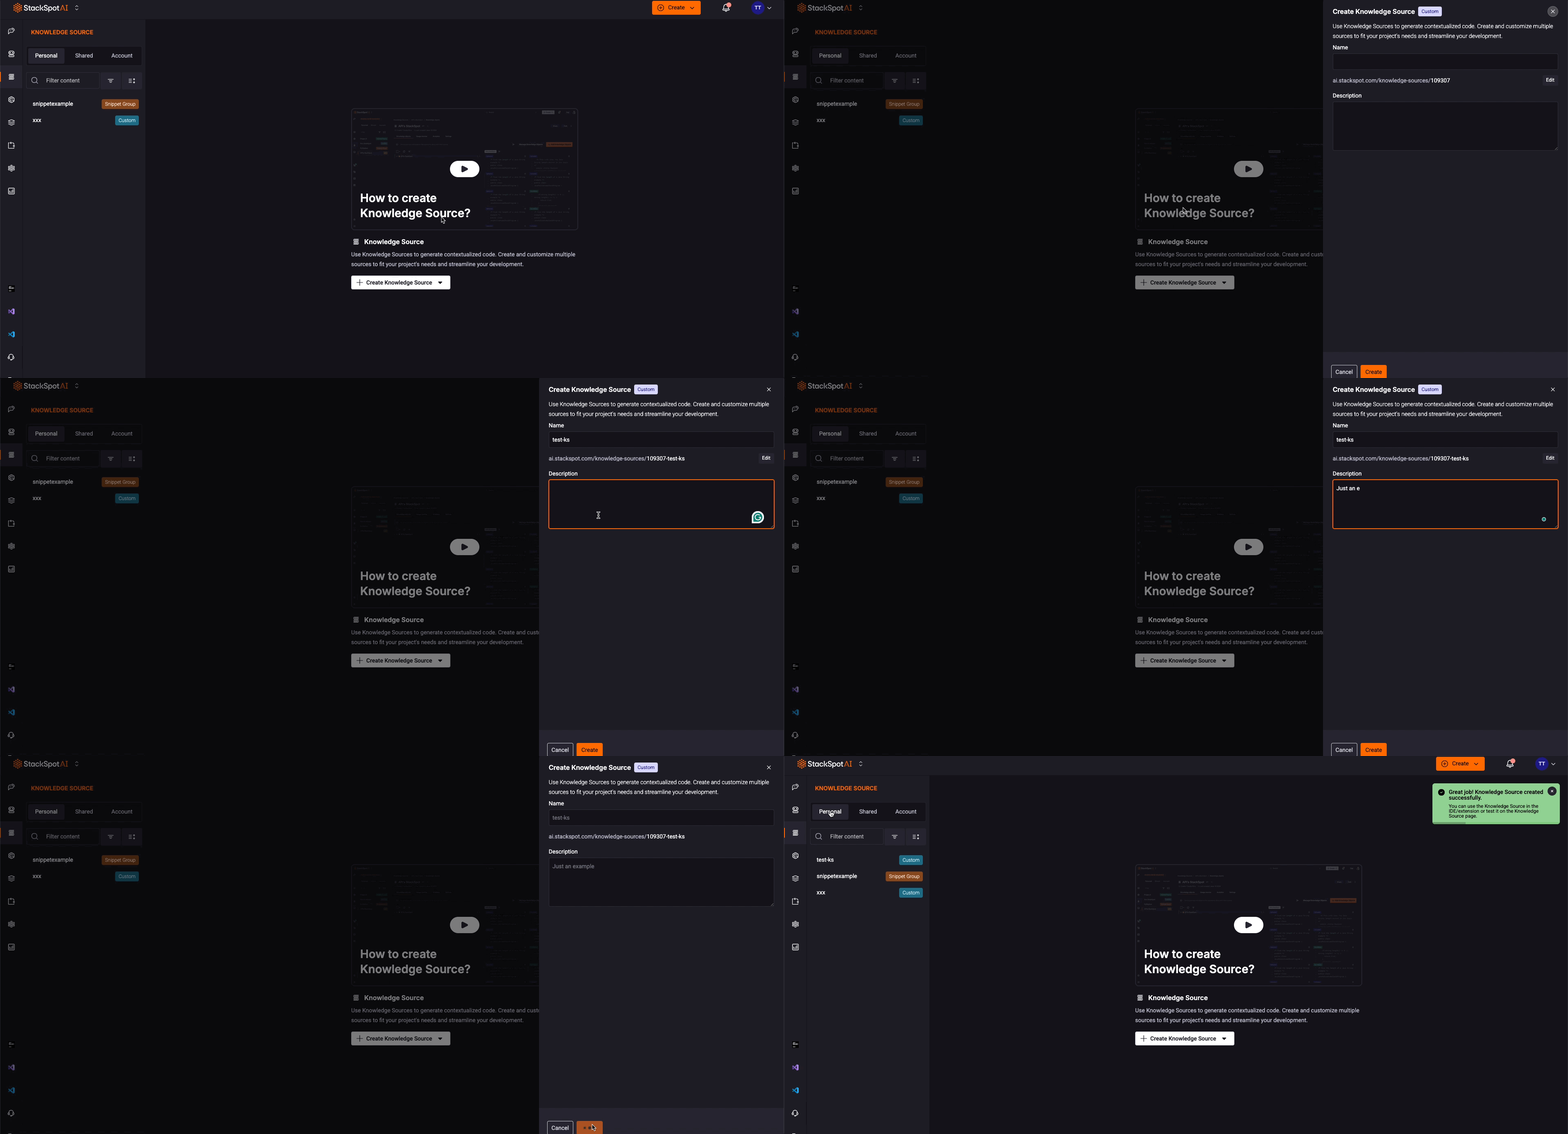
When you create Stacks AI, Knowledge Sources (KS), Quick Commands IDE(QC), Remote Quick Commands (RQC), or Agents within the StackSpot AI platform, your content will be labeled as 'Personal'. You will be able to access this content on the Personal tab on the StackSpot AI Portal. See the example below:
How to share Personal Content
You can share your personal content (Agents, Knowledge Sources, Stack AI, and Quick Commands) with specific users or the whole Account (if you are using an Enterprise one).
Follow the steps below:
Step 1. Go to the StackSpot AI Portal;
Step 2. Access the contents section you want to share, Agents, Knowledge Sources, Stack AI, or Quick Commands;
Step 3. Click on the 'Share' button. There are two options:
-
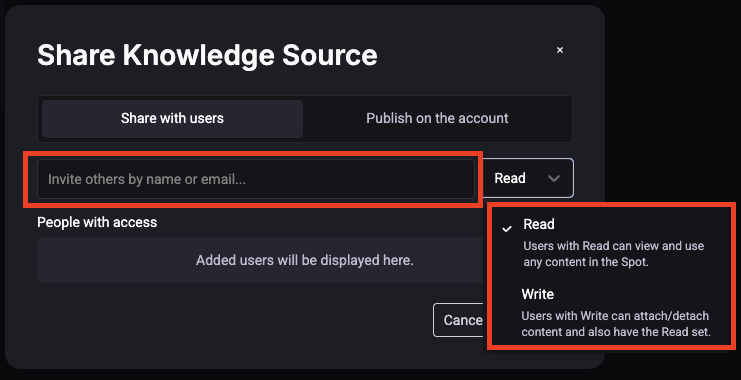
Option 1. Share with users: Add the user's email address and specify whether they have Read or Write access to the content.
- Read: Users can view and use the content.
- Write: Users can add, remove, view, and use content.
-
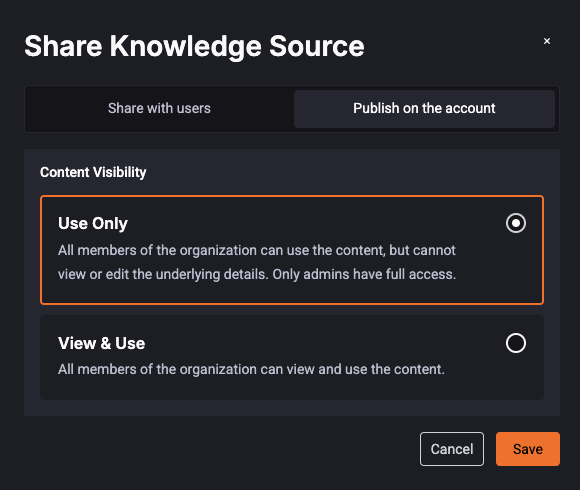
Option 2. Publish on the Account. This is available only if you have the admin permission:
- Use Only: All organization members can use the content, but cannot view or edit the underlying details. Only admins have complete access.
- View & Use: All organization members can view and use the content.
Account administrators and Account holders are allowed to share content within the Account.
Step 4. Click on the 'Save' button.
You can also revoke access to the content. On the 'Share with users' tab, select the user and then click the 'Remove Access' button.
Video: Share Content
How to access the StackSpot AI Contents
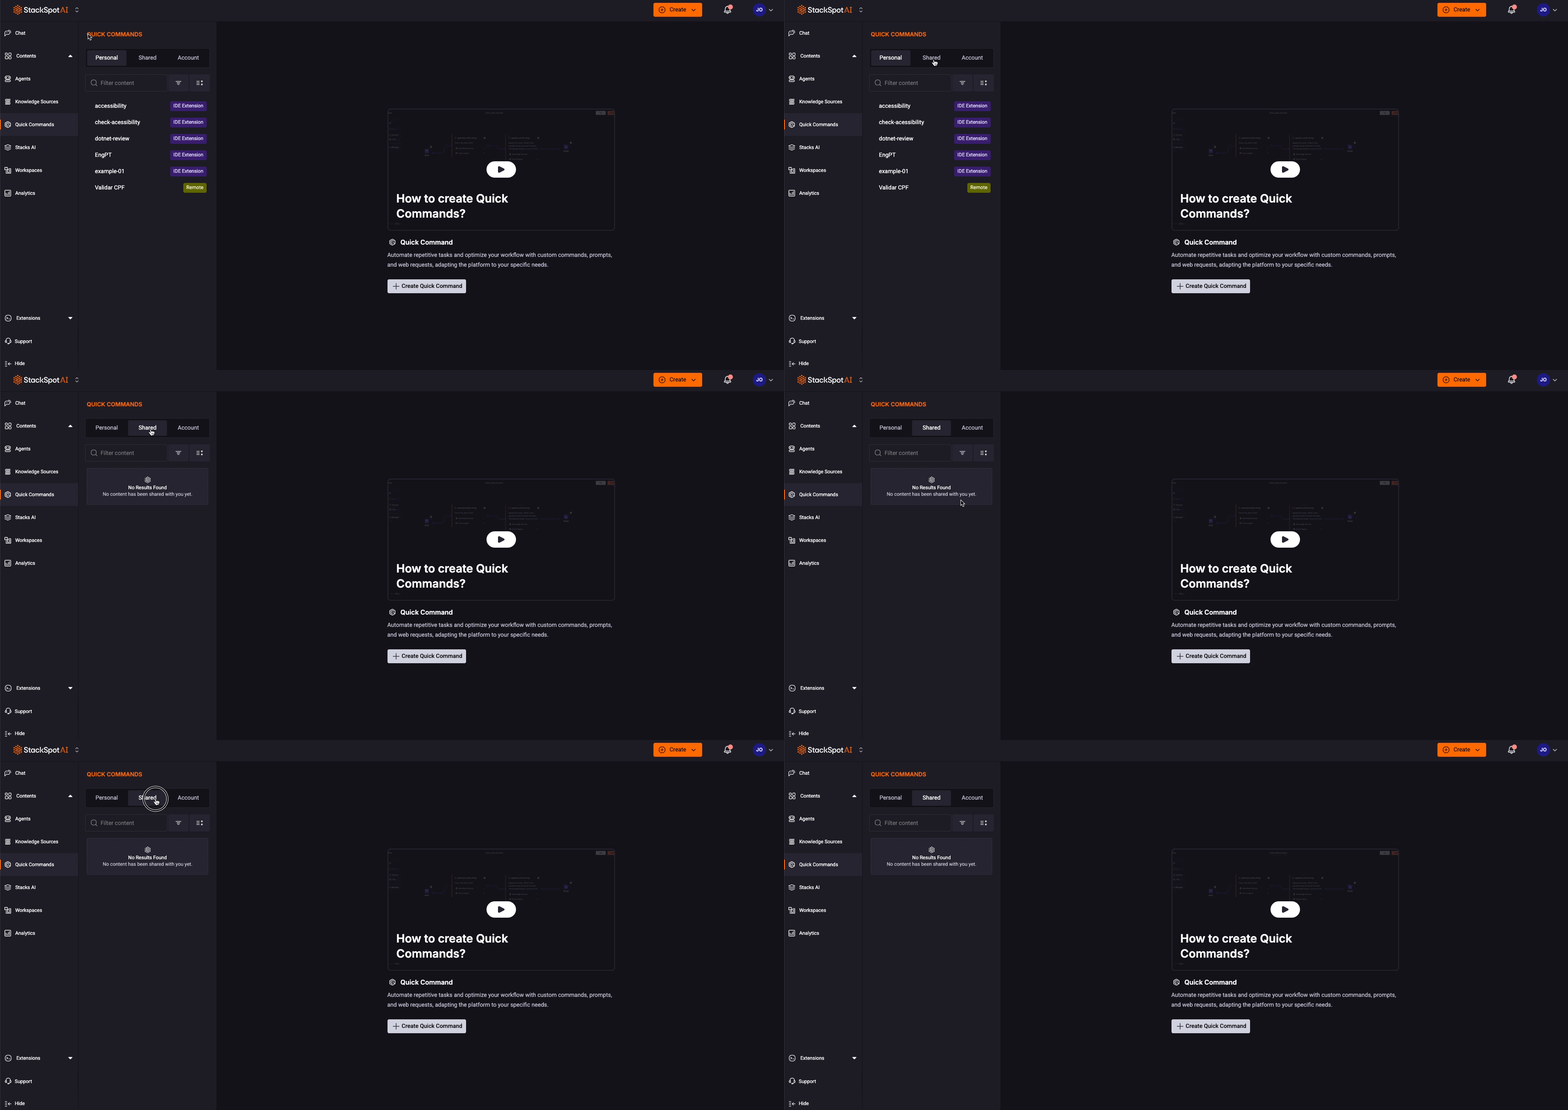
Tabs: Personal, Shared, Account
You can access content in the StackSpot AI Portal or IDE through three tabs:
- Personal: Your own created content.
- Shared: Content that has been shared with you by others.
- Account: Content available in your Organization Account.
For further details, see below.
Using content in the StackSpot AI Portal
Follow these steps to use Shared content. The process is the same for Personal and Account.
Step 1. Go to the StackSpot AI Portal;
Step 2. Access the content section you want to use, such as Agents, Stack AI, Knowledge Sources or Quick Commands;
Step 3. In the 'Shared' tab, you can access the content shared by other people.
Using content in the IDE
You can use a Personal, Shared or Account content in the IDE, follow the steps:
Step 1. Access your IDE and click in the StackSpot AI extension;
Step 2. Before typing what you want, in the chat box, choose the content you wish to: Agents, Stack AI, or Knowledge Sources.
Step 3. Click the 'Shared' to choose the available content for you.
