StackSpot AI Extensions
Overview
StackSpot AI integrates with your IDE extensions. See the available options below.
Always keep your extension up to date to ensure you have access to the latest features and improvements.
VSCode MarketPlace
StackSpot AI is only compatible with Visual Code Studio version 1.74.0 or later.
Follow the steps below:
Step 1. Open your Visual Code Studio;
Step 2. On the left side menu, click ‘Extensions’;
Step 3. Search for 'StackSpot AI' on the search bar. Then click ‘Install’;
Step 4. Open StackSpot AI on your left side and login.
Visual Studio
The Visual Studio extension for StackSpot AI functions as a plugin within the IDE, offering all the features.
To install Visual Studio extension, follow the steps:
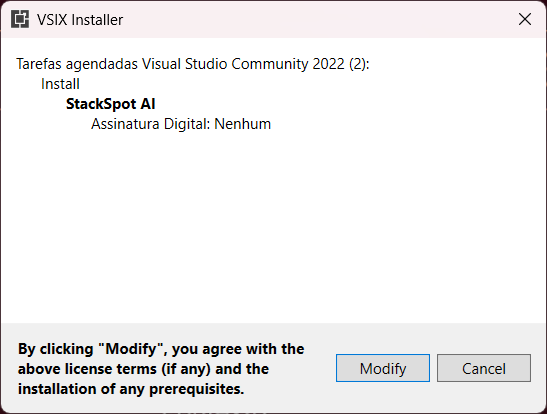
Step 1. Install the extension:
- Open Visual Studio;
- Go to the Extensions menu and select Manage Extensions;
- Search for StackSpot AI in the marketplace and click Install;

- Close Visual Studio and click 'Modify'.
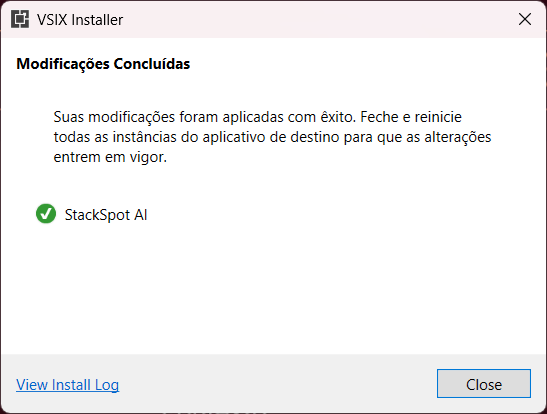
You can also find the StackSpot AI extension for Visual Studio in the marketplace
Step 2. Login to StackSpot AI:
- After installation, open the StackSpot AI panel within Visual Studio;
- Access the 'View' menu and click on the 'StackSpot AI' option;
- Log in using your credentials.

Step 3. Start using the extension directly from the IDE.
StackSpotAI Doctor Command
The StackSpotAI Doctor command was developed to help you resolve common issues that may arise when using the StackSpot AI extension in VSCode. By executing this command, a series of automated steps will ensure that your development environment is functioning perfectly.
The actions executed by the command include:
Cache Cleaning: Removes temporary files that may be causing conflicts or slowdowns. Version Update: Checks for and installs the latest version of the StackSpot AI extension. System Preferences Cleaning: Restores default settings that may have been altered and are causing issues. Proxy Validation: Verifies and adjusts proxy settings to ensure the extension can communicate correctly with StackSpot servers.
Press Ctrl/Cmd + Shift + P and type Run StackSpotAI Doctor to use it.
This command may edit your IDE preferences.
JetBrains IDE
JetBrains on macOS
You need to install the IDE manually on macOS operating systems with an Intel processor. Follow the steps below:
Step 1. Access the Marketplace;
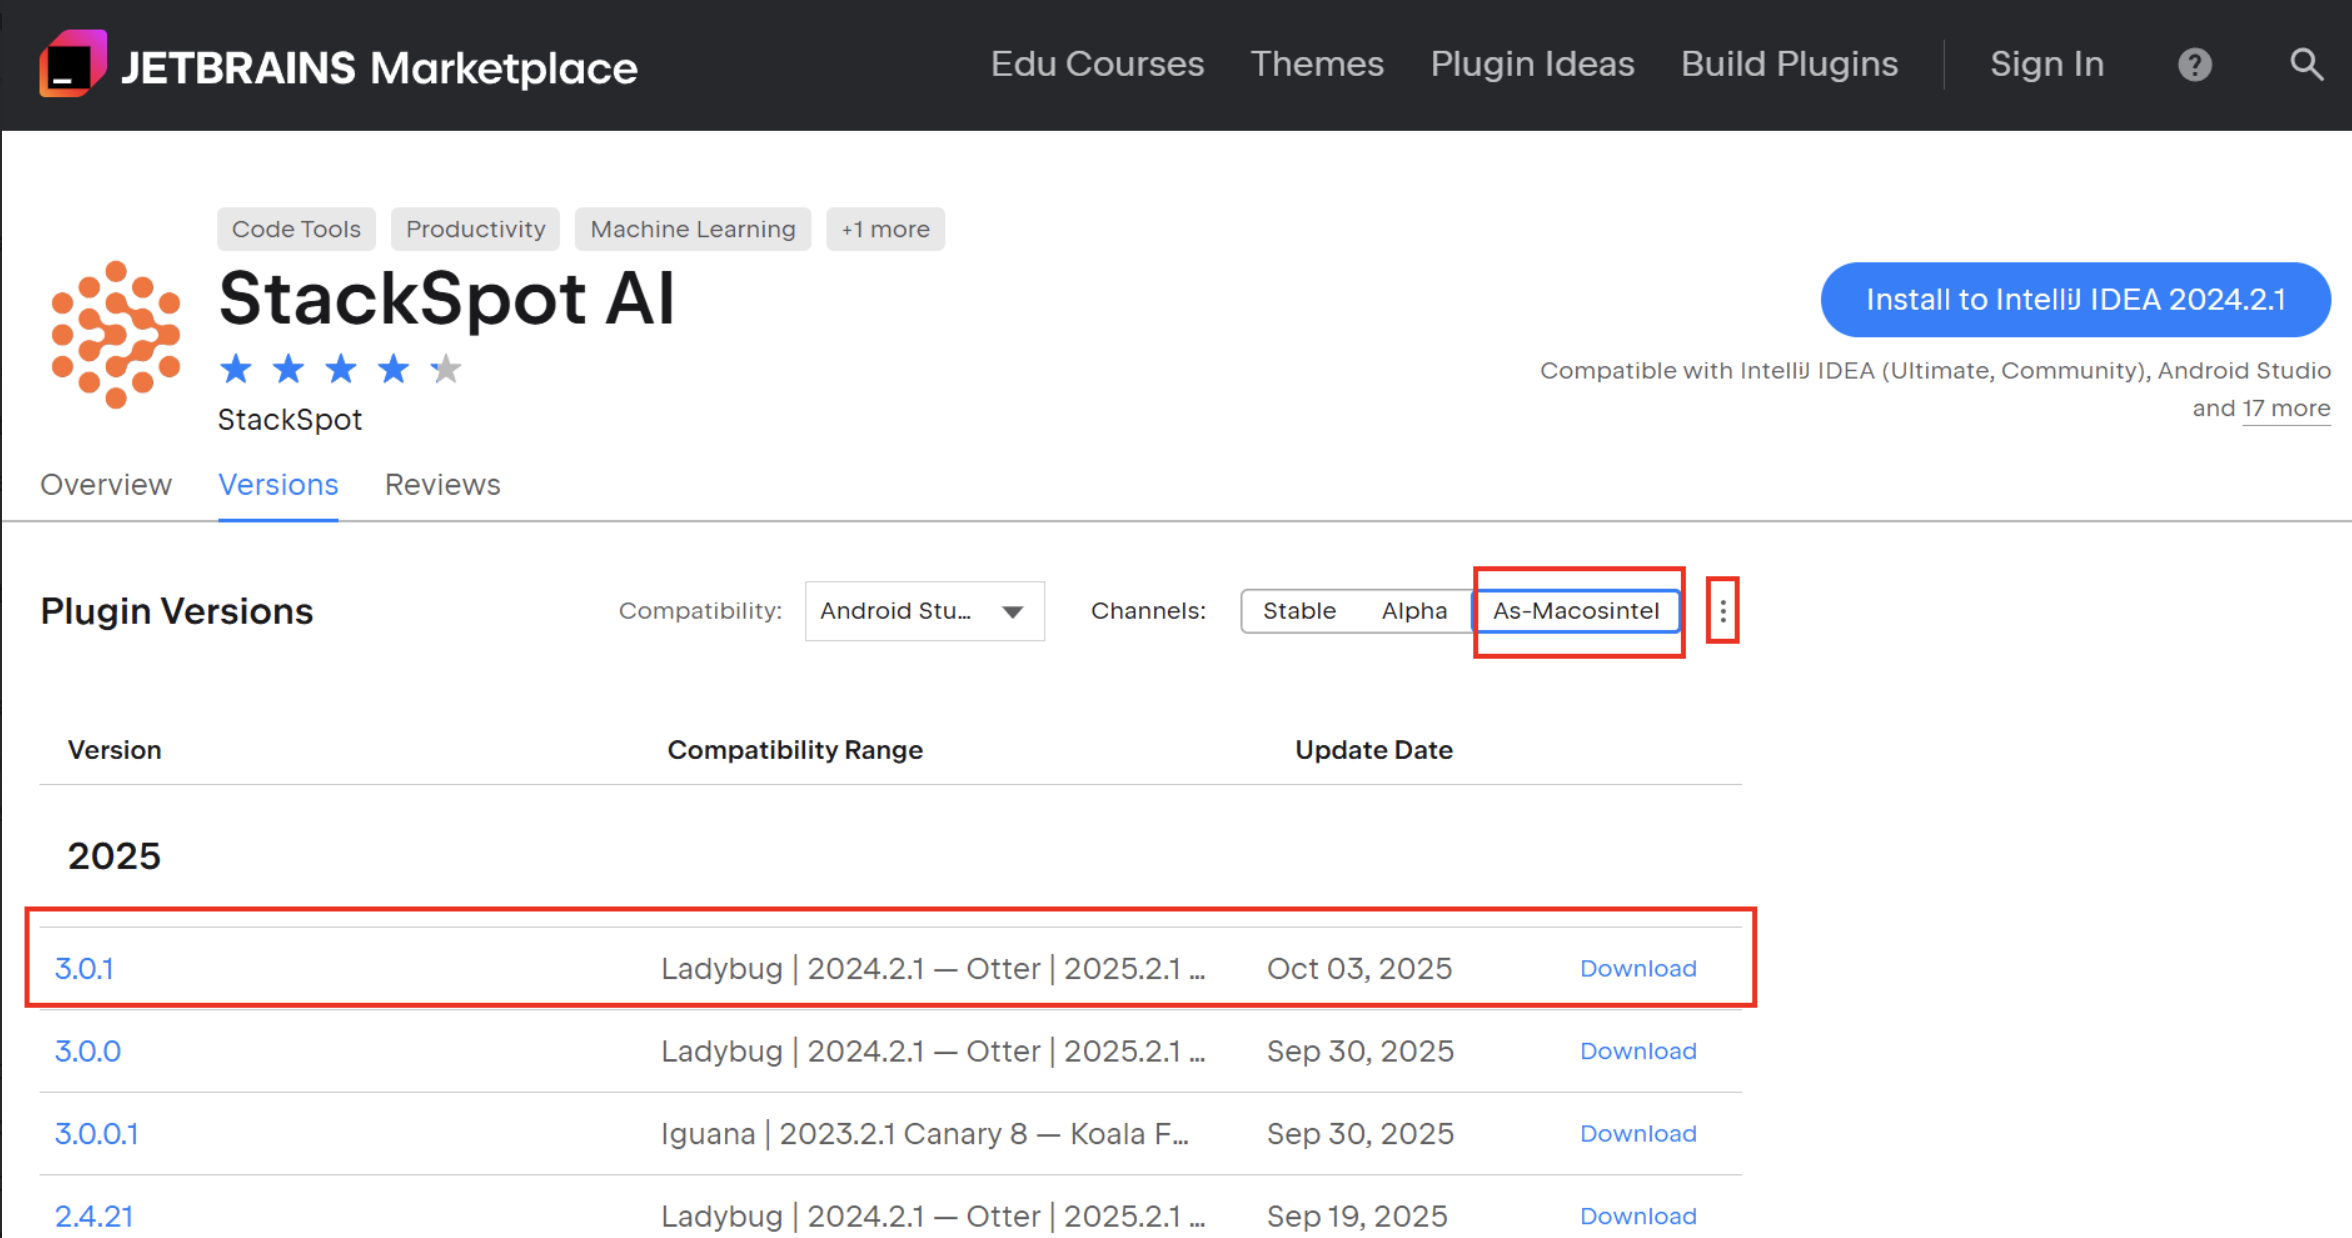
Step 2. Click on the three dots next to the extension and select the As-Macosintel option to download the .zip file;
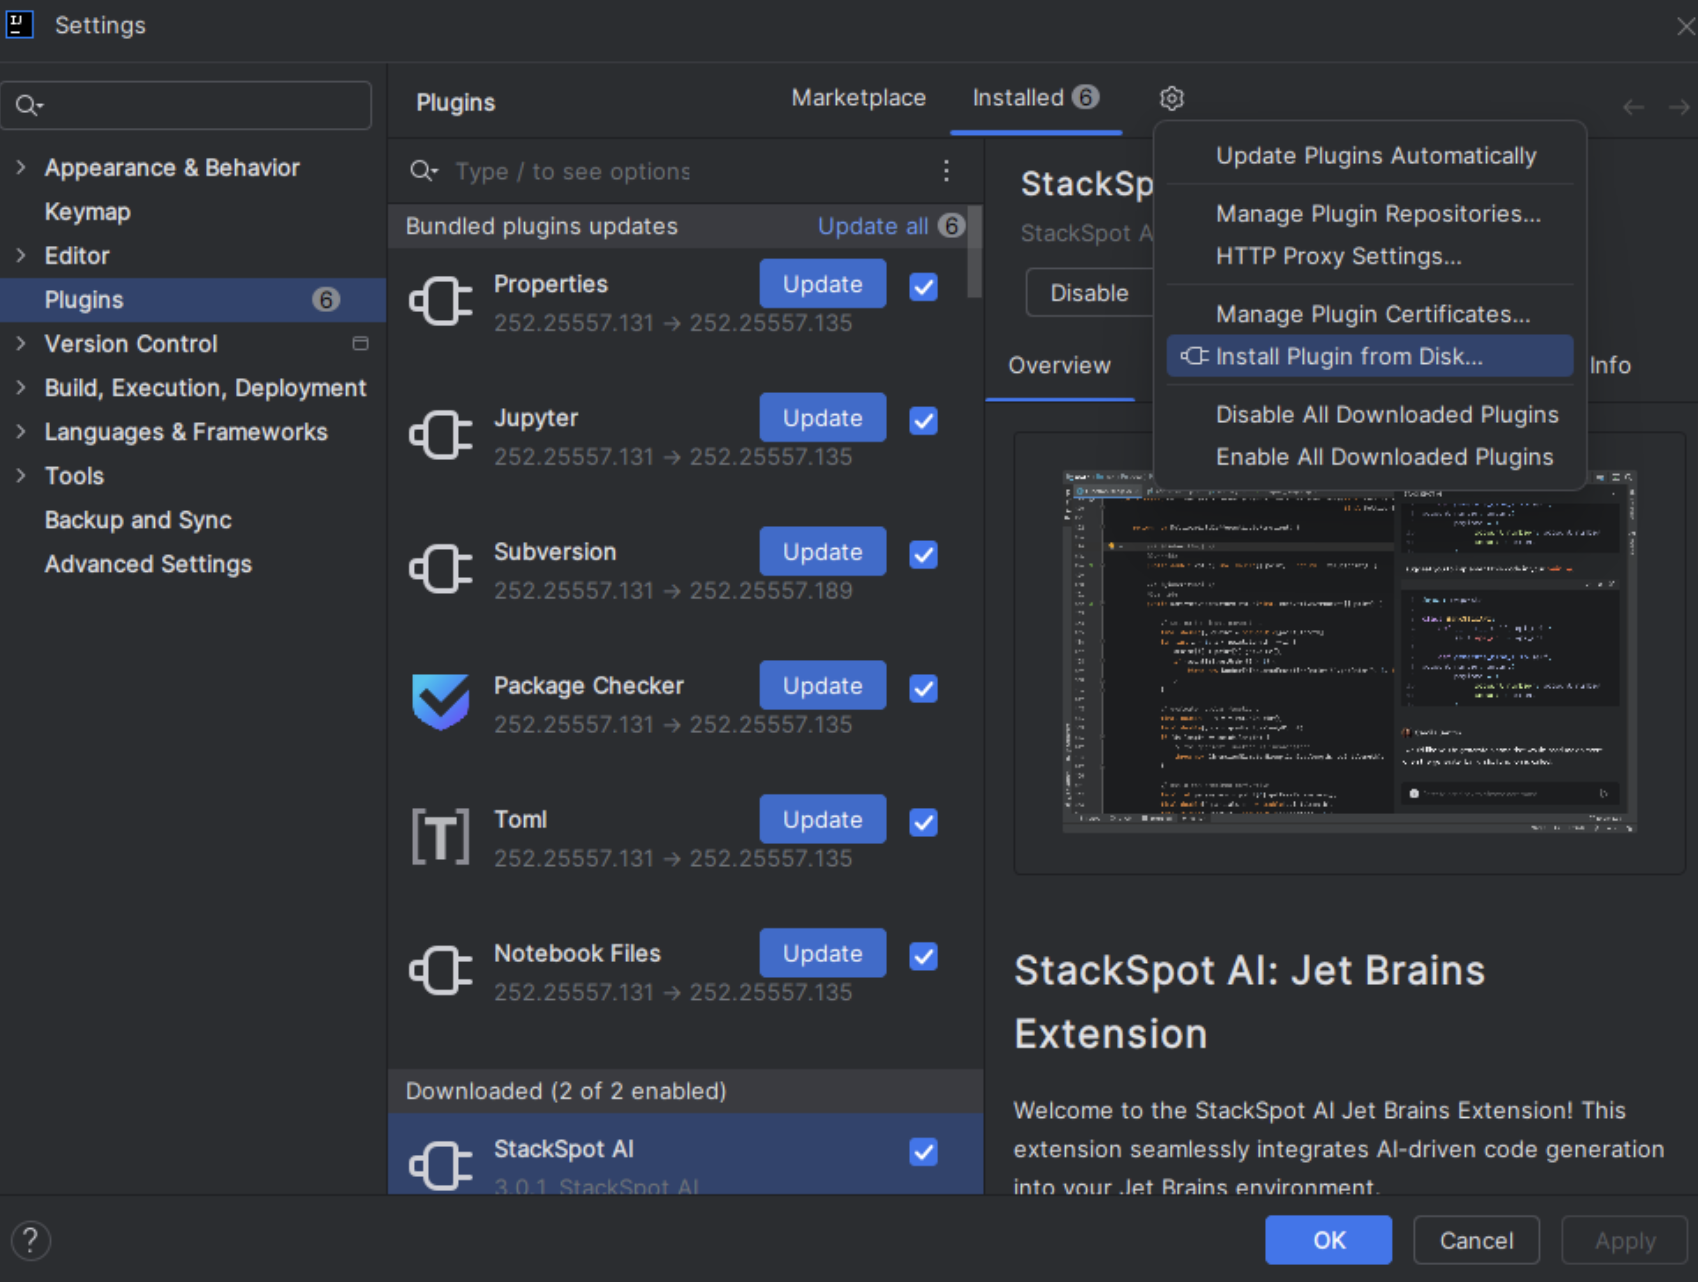
Step 3. After downloading, open your JetBrains IDE and go to ‘Settings > Plugins > gear icon next to Installed > Install from Disk’. Select the downloaded .zip file.
How to keep the StackSpot AI Extension updated on macOS Intel
Ensure that the StackSpot AI extension is always automatically updated on macOS with an Intel processor. Follow the steps below:
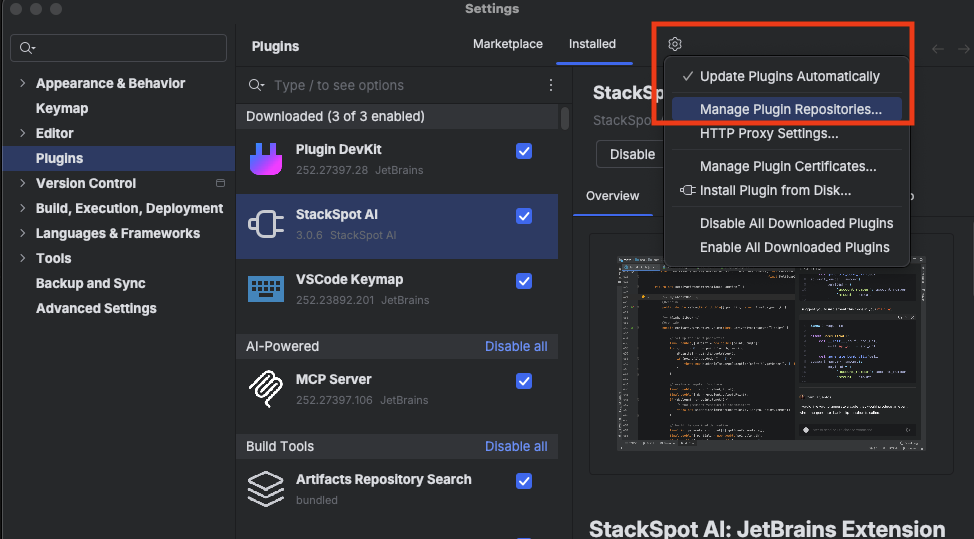
Step 1. Open your JetBrains IDE and go to ‘Settings > Plugins’;
Step 2. Click the settings icon and select ‘Manage Plugin Repositories’;
Step 3. Add the following repository link directly in the field:
See the example below:
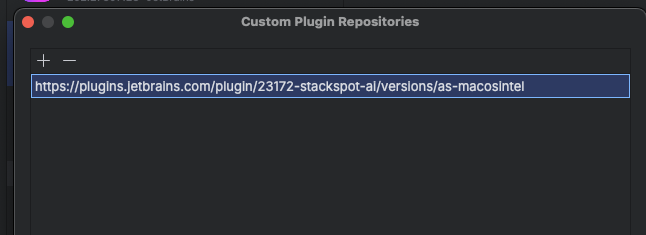
Done! Now, the StackSpot AI extension will be updated automatically and you will always have the compatible version installed.
IntelliJ IDEA
If you are using version 1.3.4, please update to version 1.5.6.
Follow the steps:
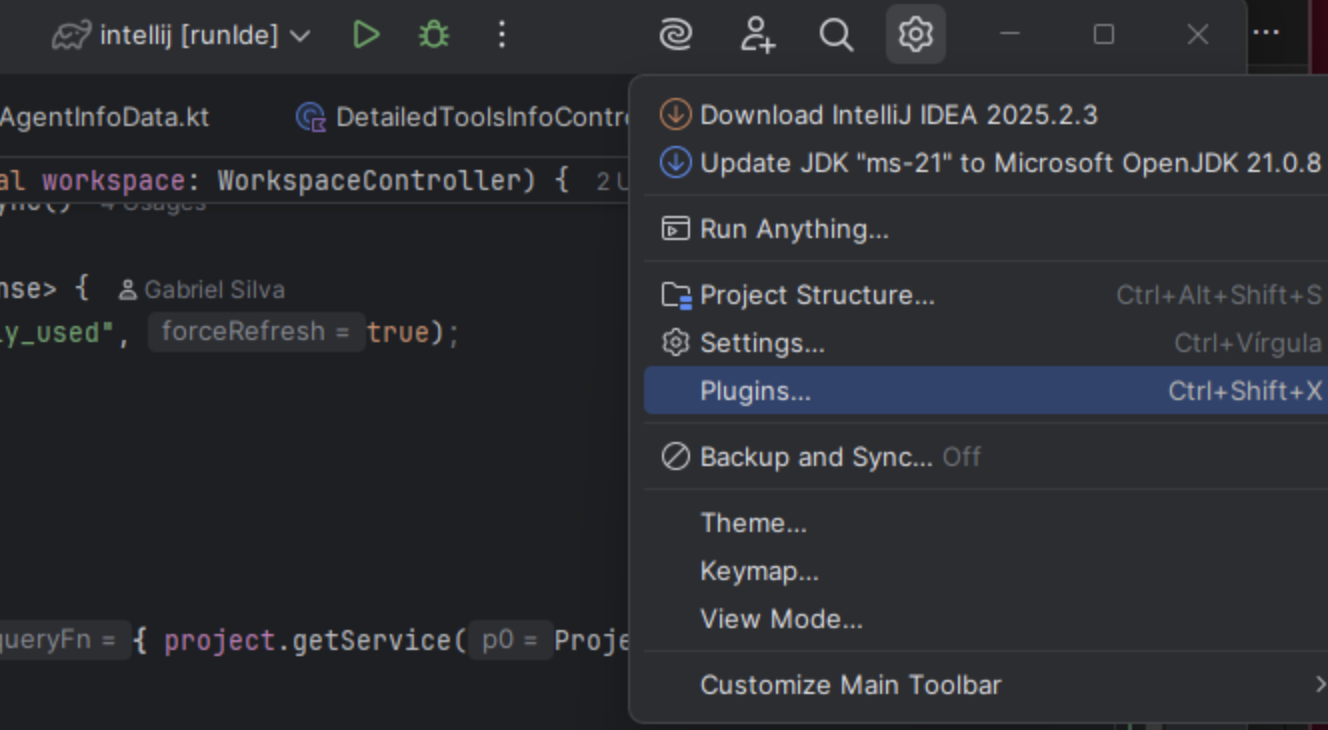
Step 1. Open your IntelliJ;
Step 2. On the left side menu, click ‘Plugins’;
Step 3. Search for StackSpot AI on the search bar. Then click ‘Install’;
Step 4. Restart your IDE. Open StackSpot AI and login.
See an example below:
Next Step
- Get Started with the StackSpot AI extension.