Create a Spot
Create Spot
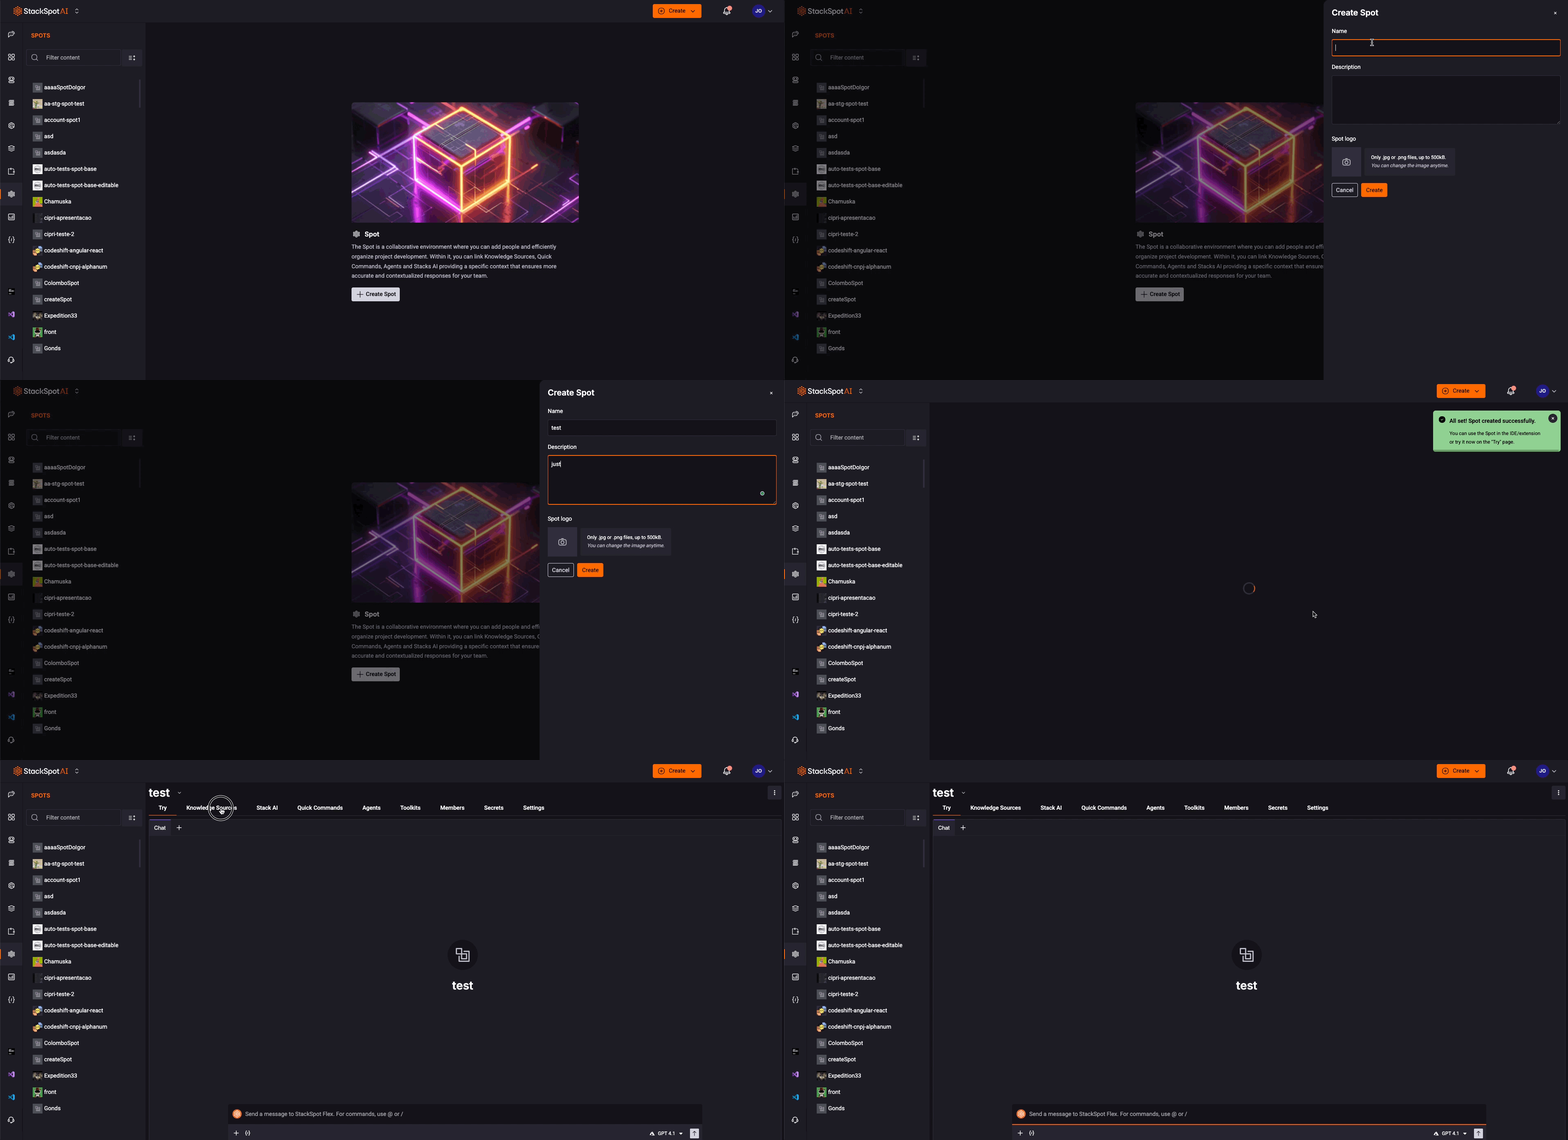
Follow the steps to create a Spot:
Step 1. Access the StackSpot AI Portal;
Step 2. Click on the ‘Spots‘ button on the menu. Then click ‘Create Spot‘;
Step 3. Add the following:
- Name: Add a name for your Spot.
- Description: Write the purpose of creating this Spot.
- Spot logo: Add an image as your logo.
Step 4. Click the ‘Create‘ button.

Add content to the Spot
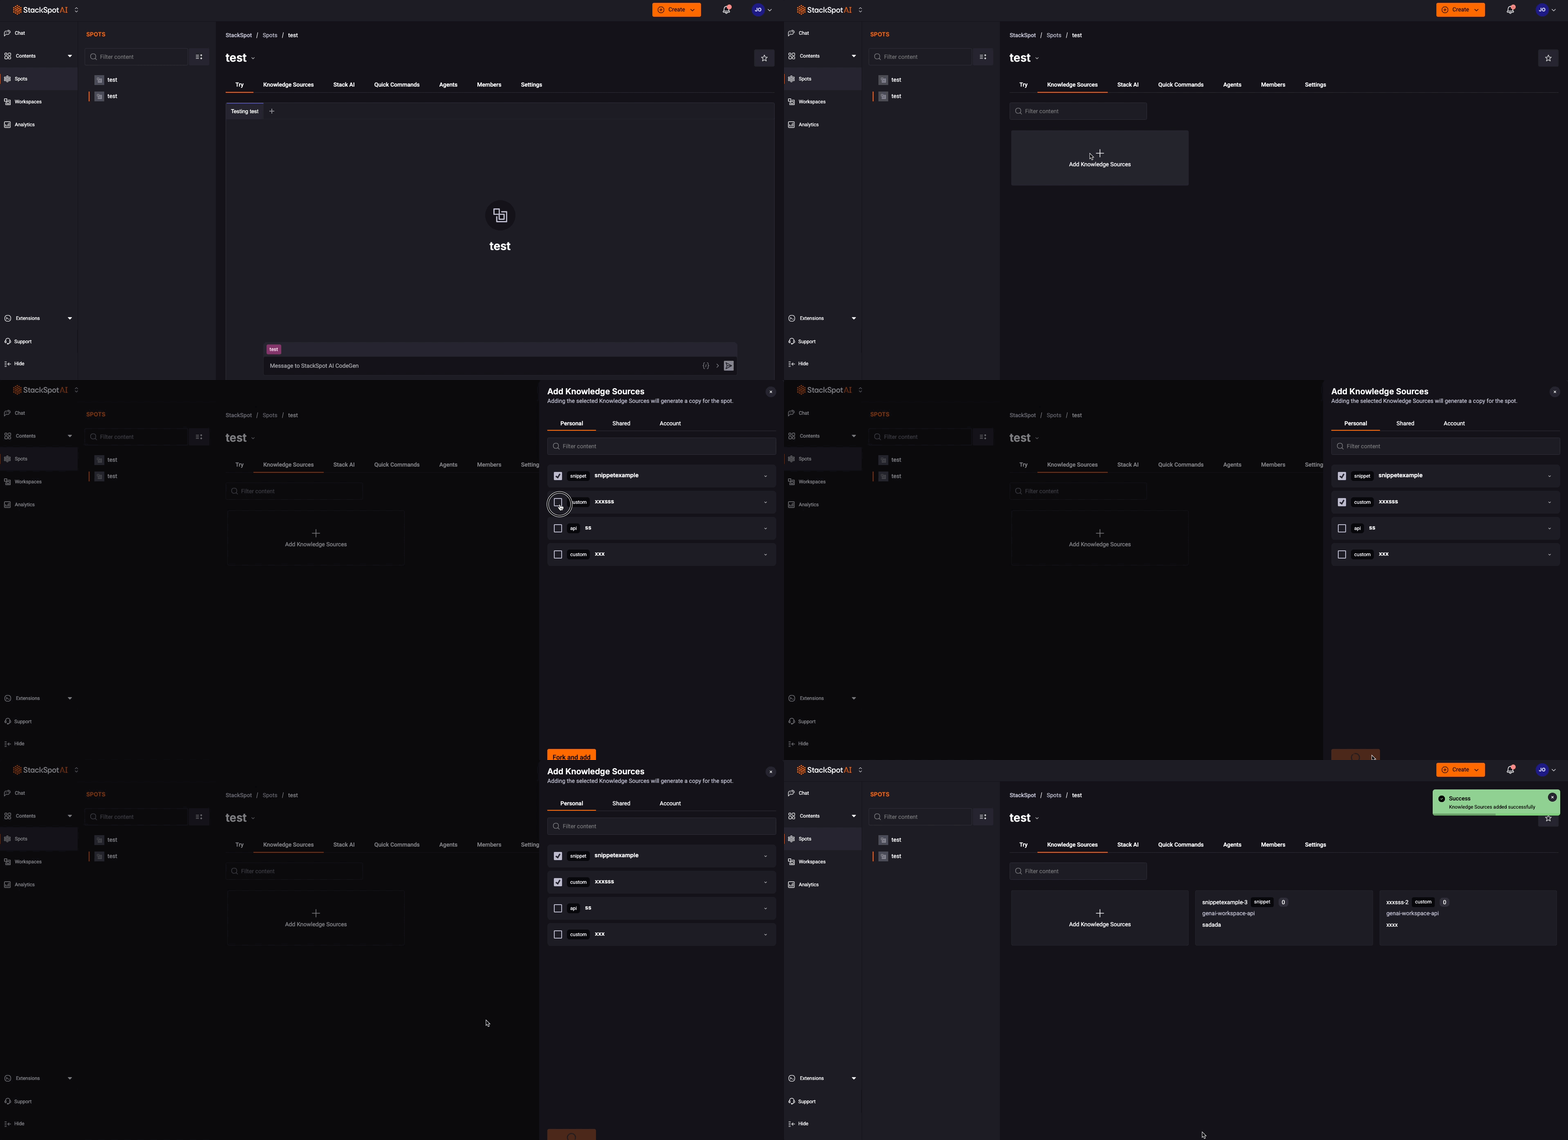
To enhance your Spot, you can add various types of content, such as Knowledge Sources, Stack AI, Quick Commands, and Agents. Follow the steps below:
Step 1. Click on the content you want to add (Knowledge Source, Stack AI, Quick Command, and Agents). For this example, Knowledge Source;
Step 2. Click the ‘Add button‘. In this case, you will see the ‘Add Knowledge Source‘ button;
Step 3. Choose your content, then click the ‘Fork and Add’ button.
To remove content from Spot, click the 'Delete' button next to it.

Add members to a Spot
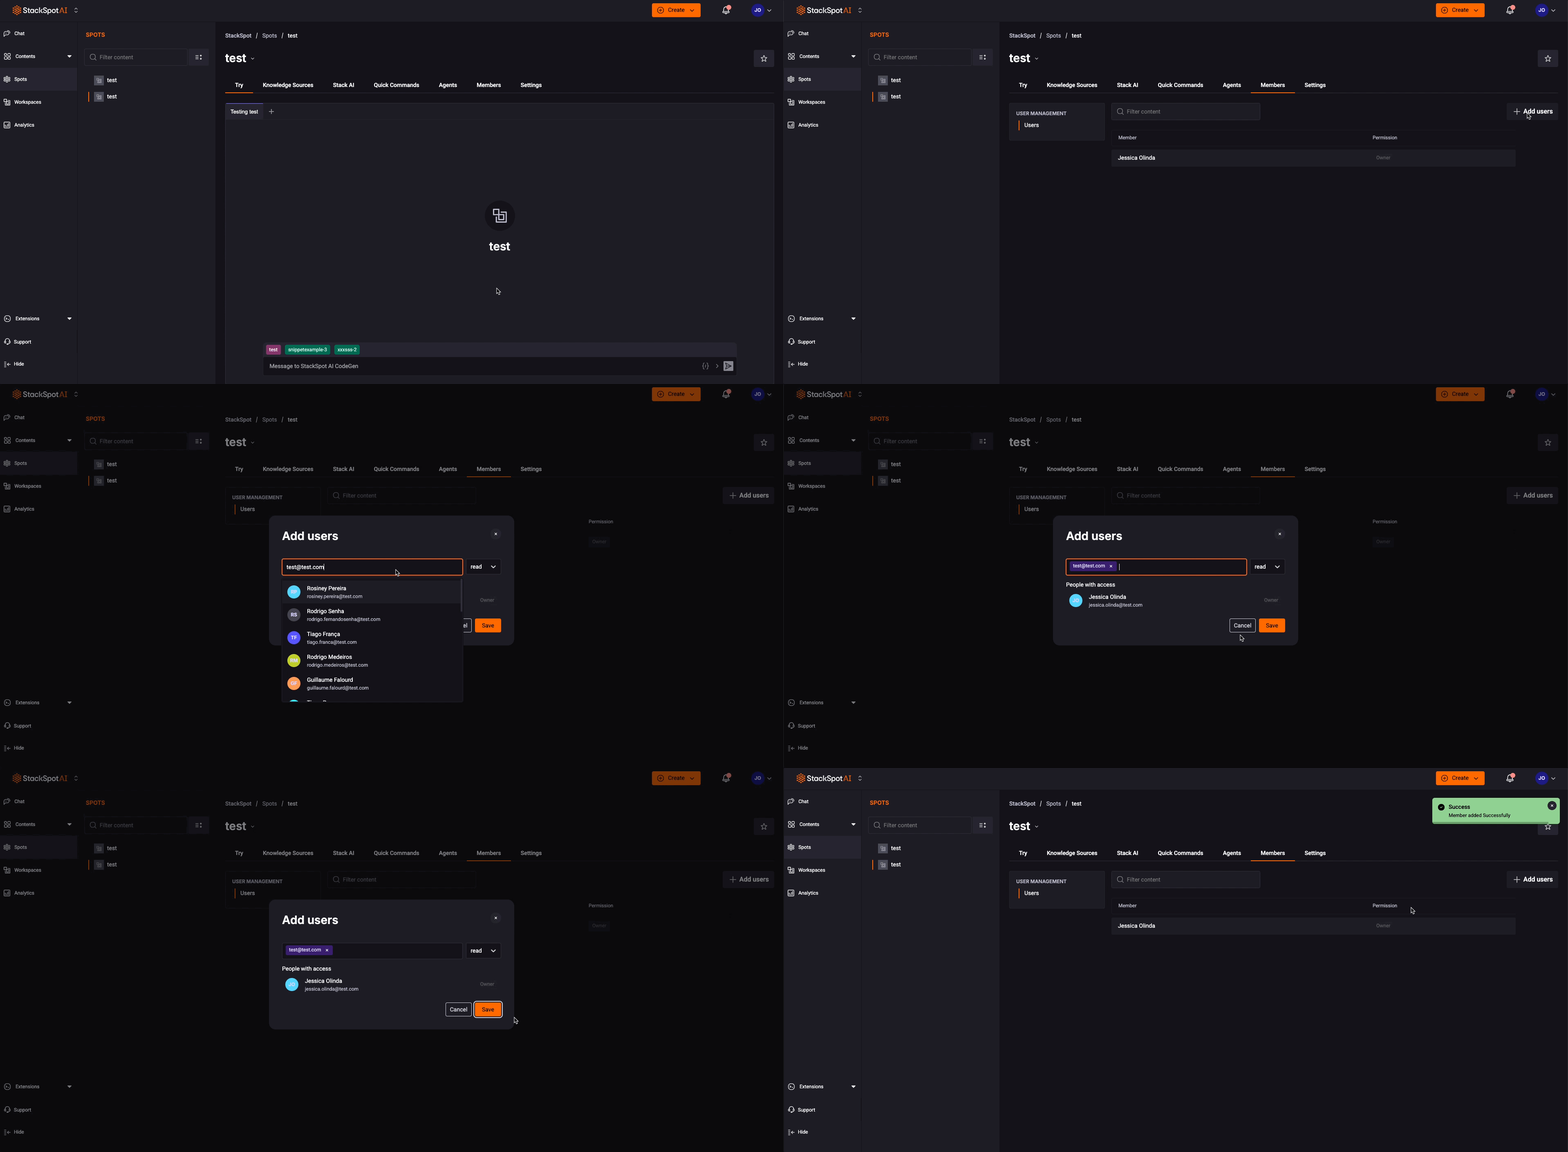
You can invite members and share the ability to edit or view your content. Follow the steps below:
Step 1. Access your Spot on the StackSpot AI Portal;
Step 2. Click on the ‘Members’ tab;
Step 3. Now, click on the ‘Add users’ button;
Step 4. Enter the user's email address and select the option:
- Read: Users can view and use the content.
- Write: Users can add, remove, view, and use content.
You can add multiple email addresses by separating them with semicolons.
Example: person1@email.com; person2@email.com
StackSpot AI recommends sending a maximum of 10 invitations at once.
Then, click on the ‘Save’ button.
