Create Knowledge Sources
Learn how to create a Knowledge Source. Follow the instructions:
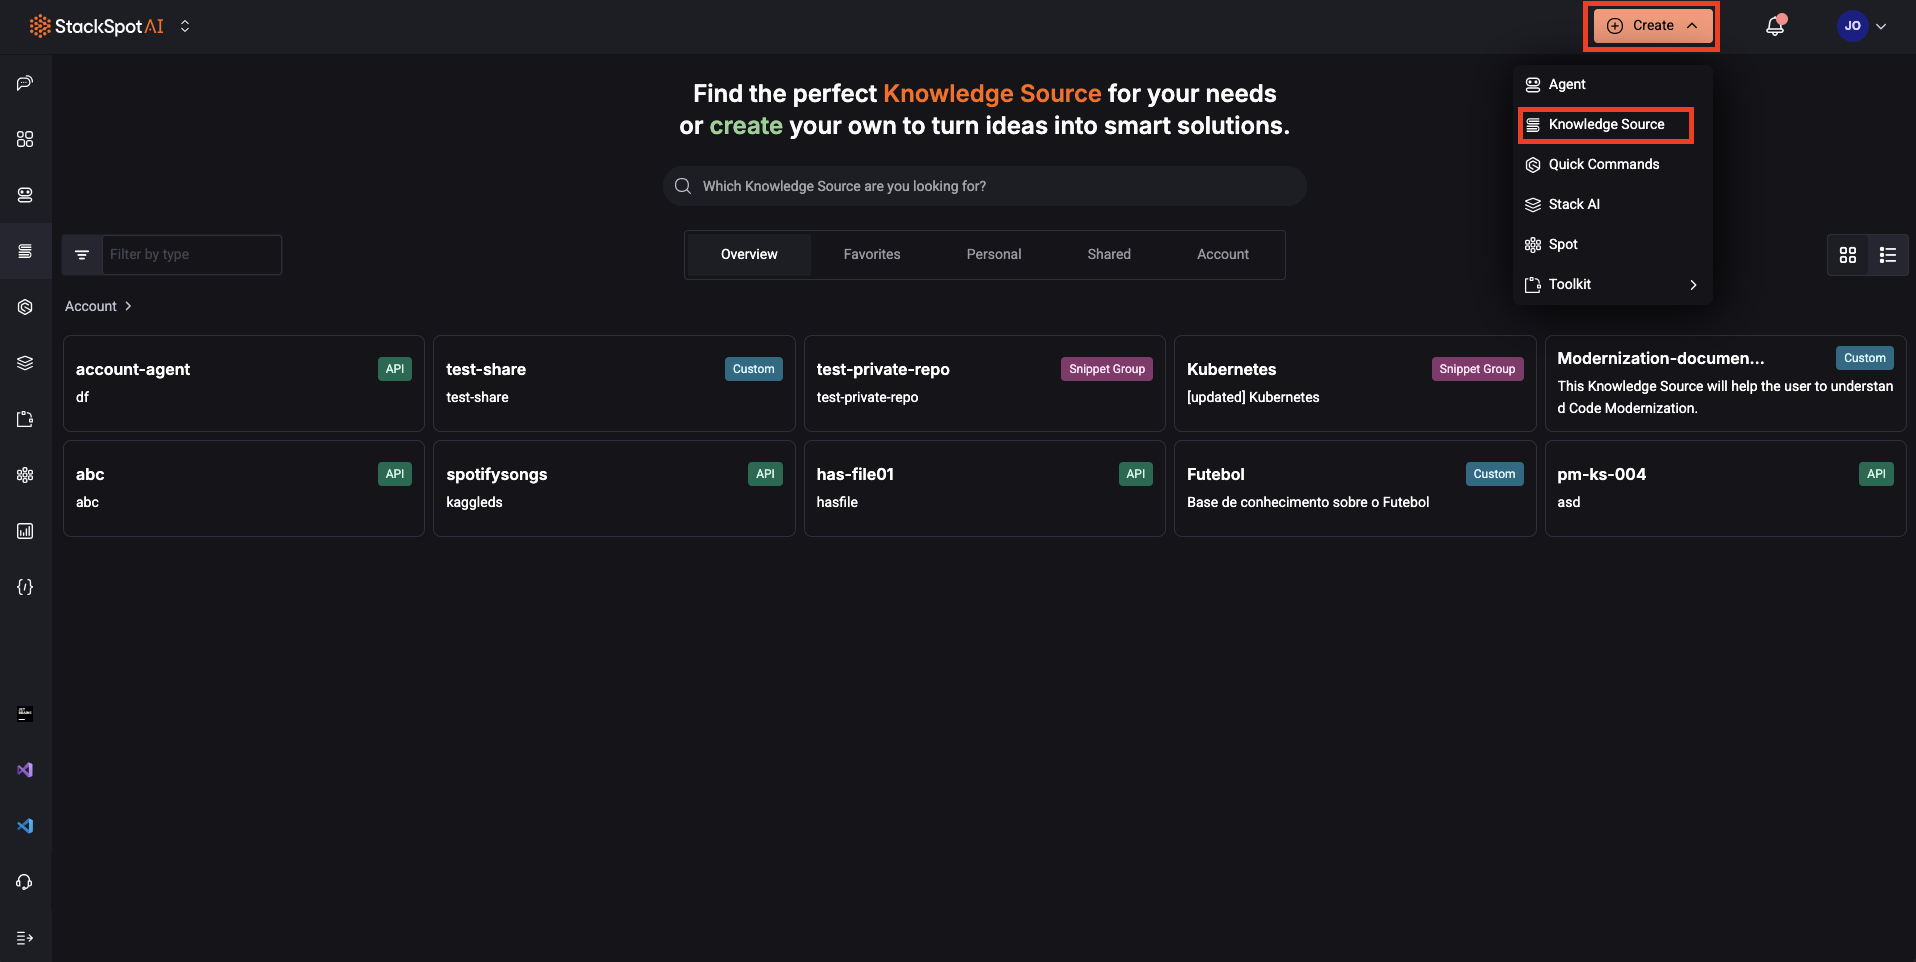
1. Access the StackSpot AI Portal;
2. Click ‘Knowledge Sources’, then click the ‘Create’ button;
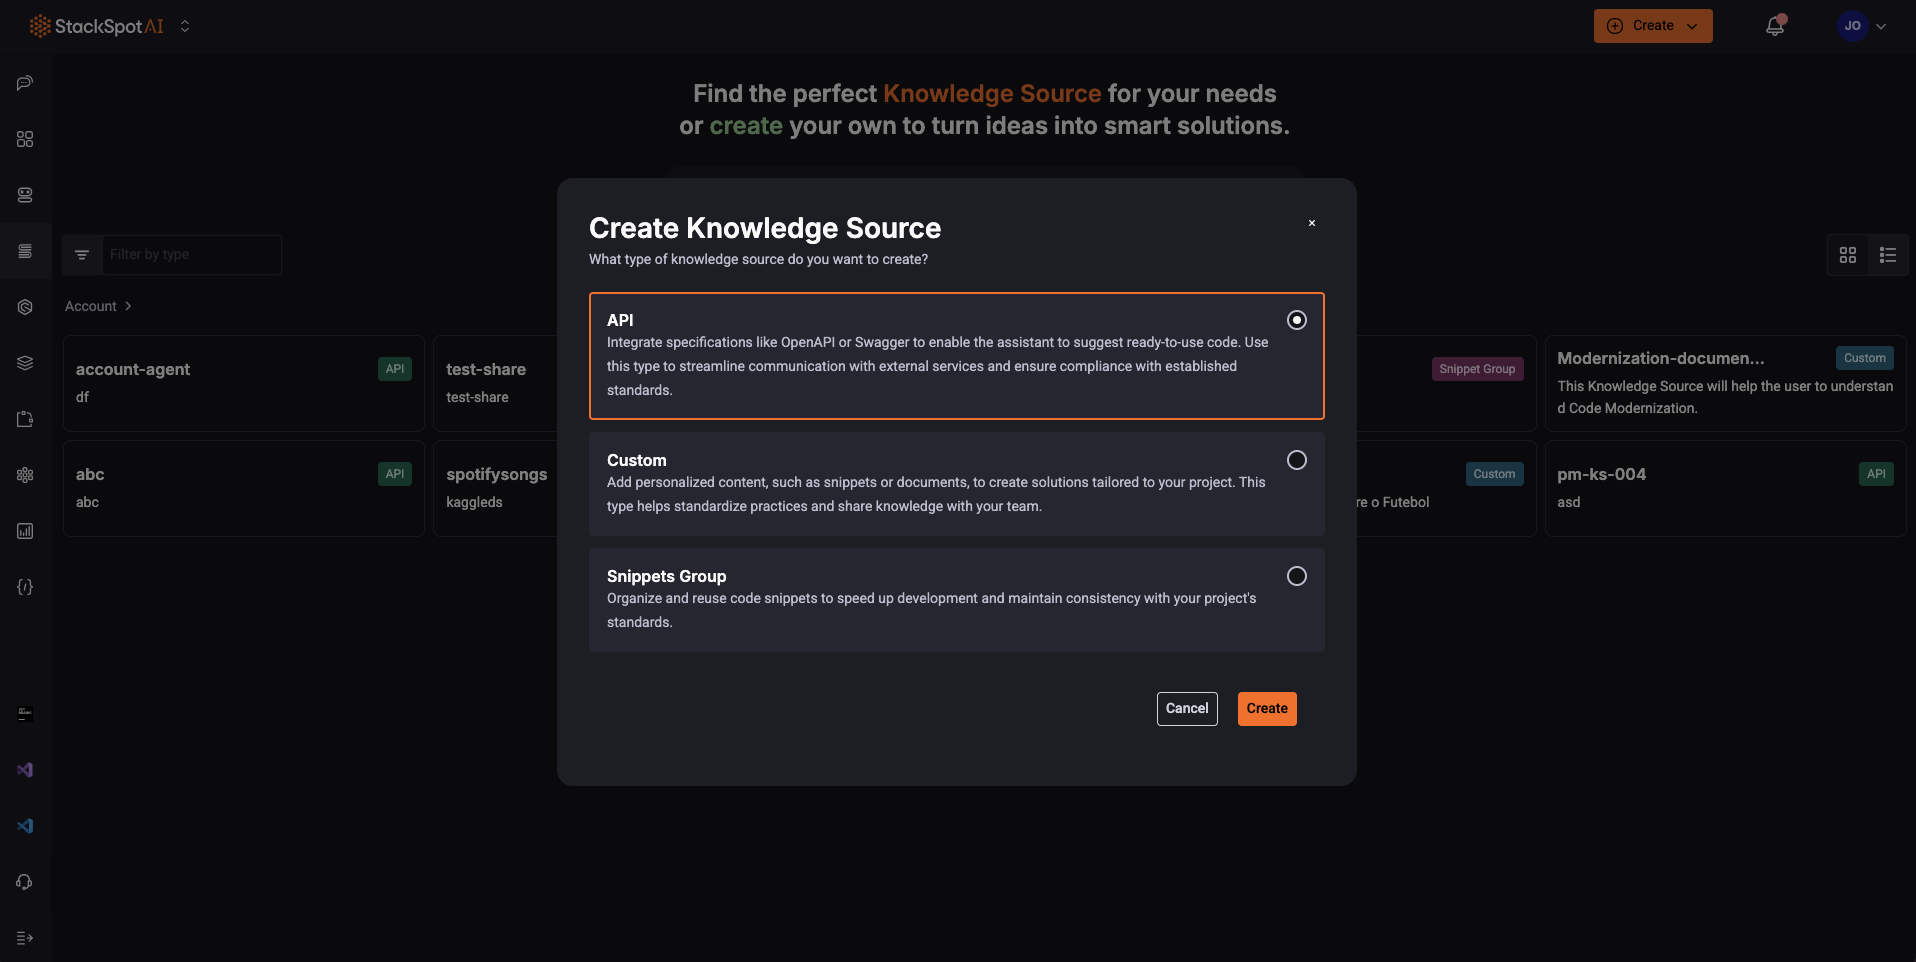
3. Choose the Knowledge source type you want to create API, Custom or Snippets Group. Each type has specific fields. Select one and follow the steps below.
1. API
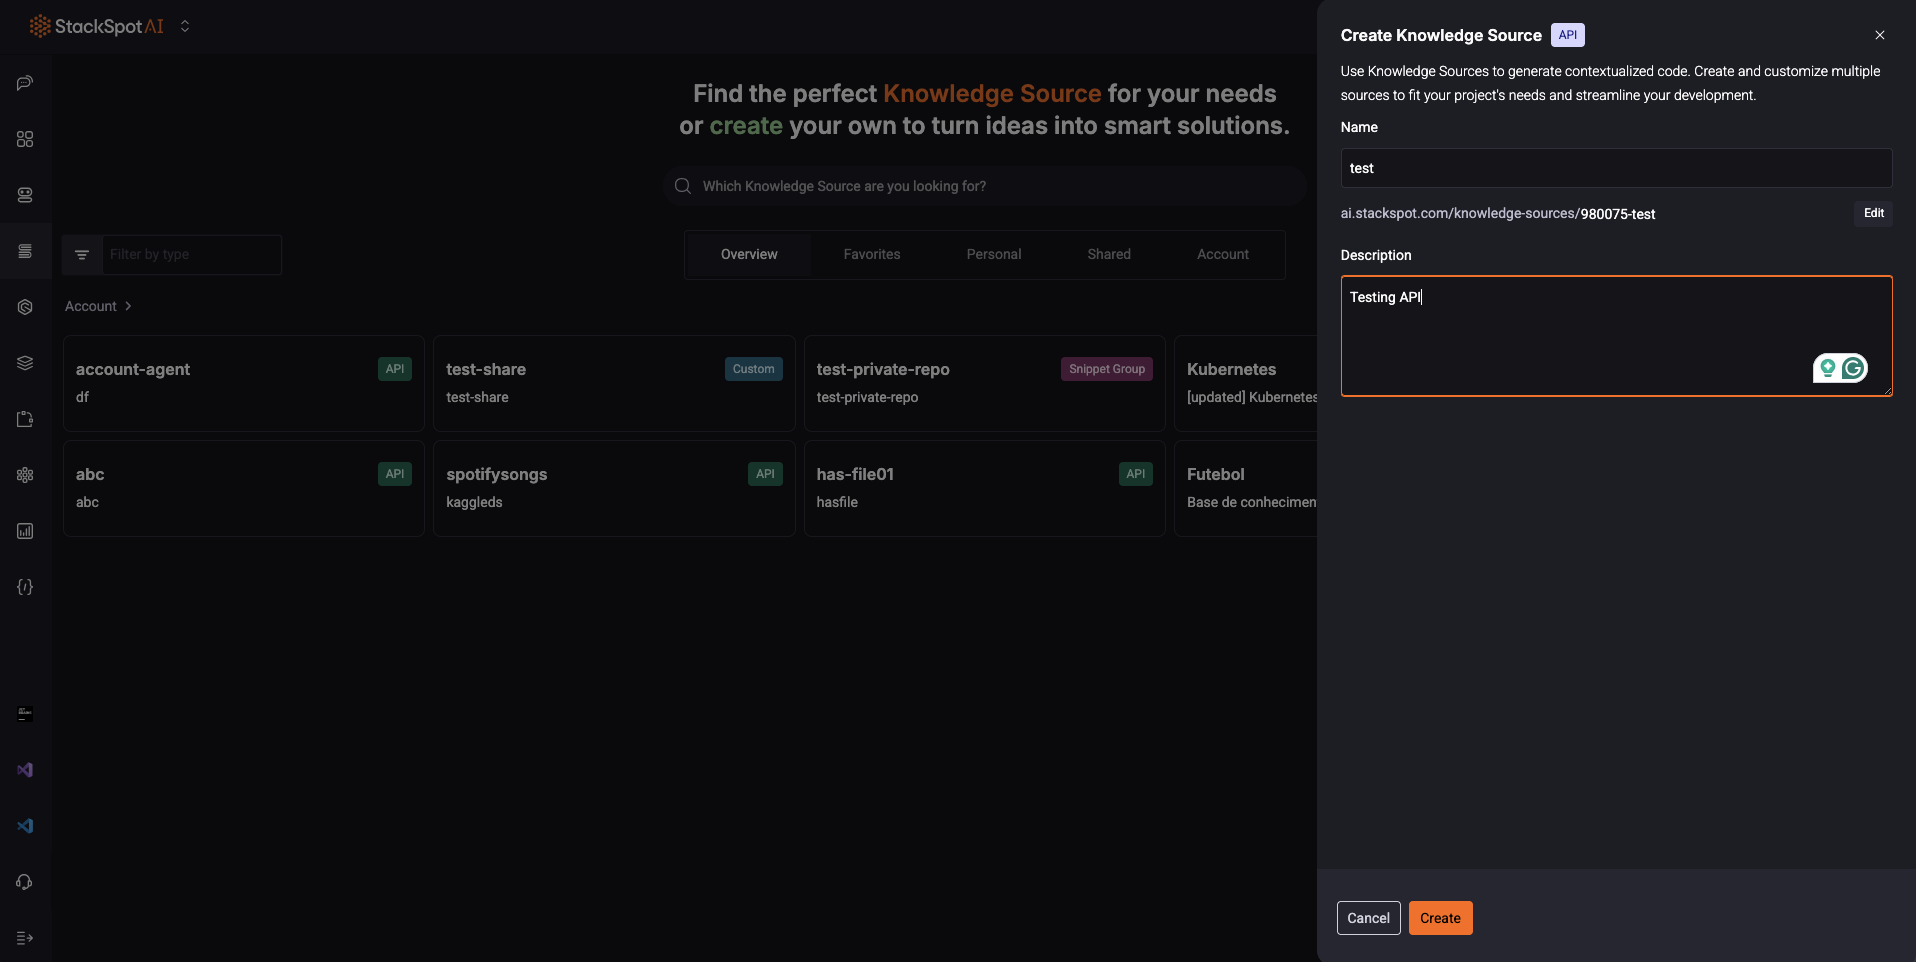
Step 1. Fill out the fields:
- Knowledge Source: Add a name.
- Slug Identification: This is your Knowledge Source URL. You cannot edit later.
- Description: Describe what it is about.
Click ‘Create’;
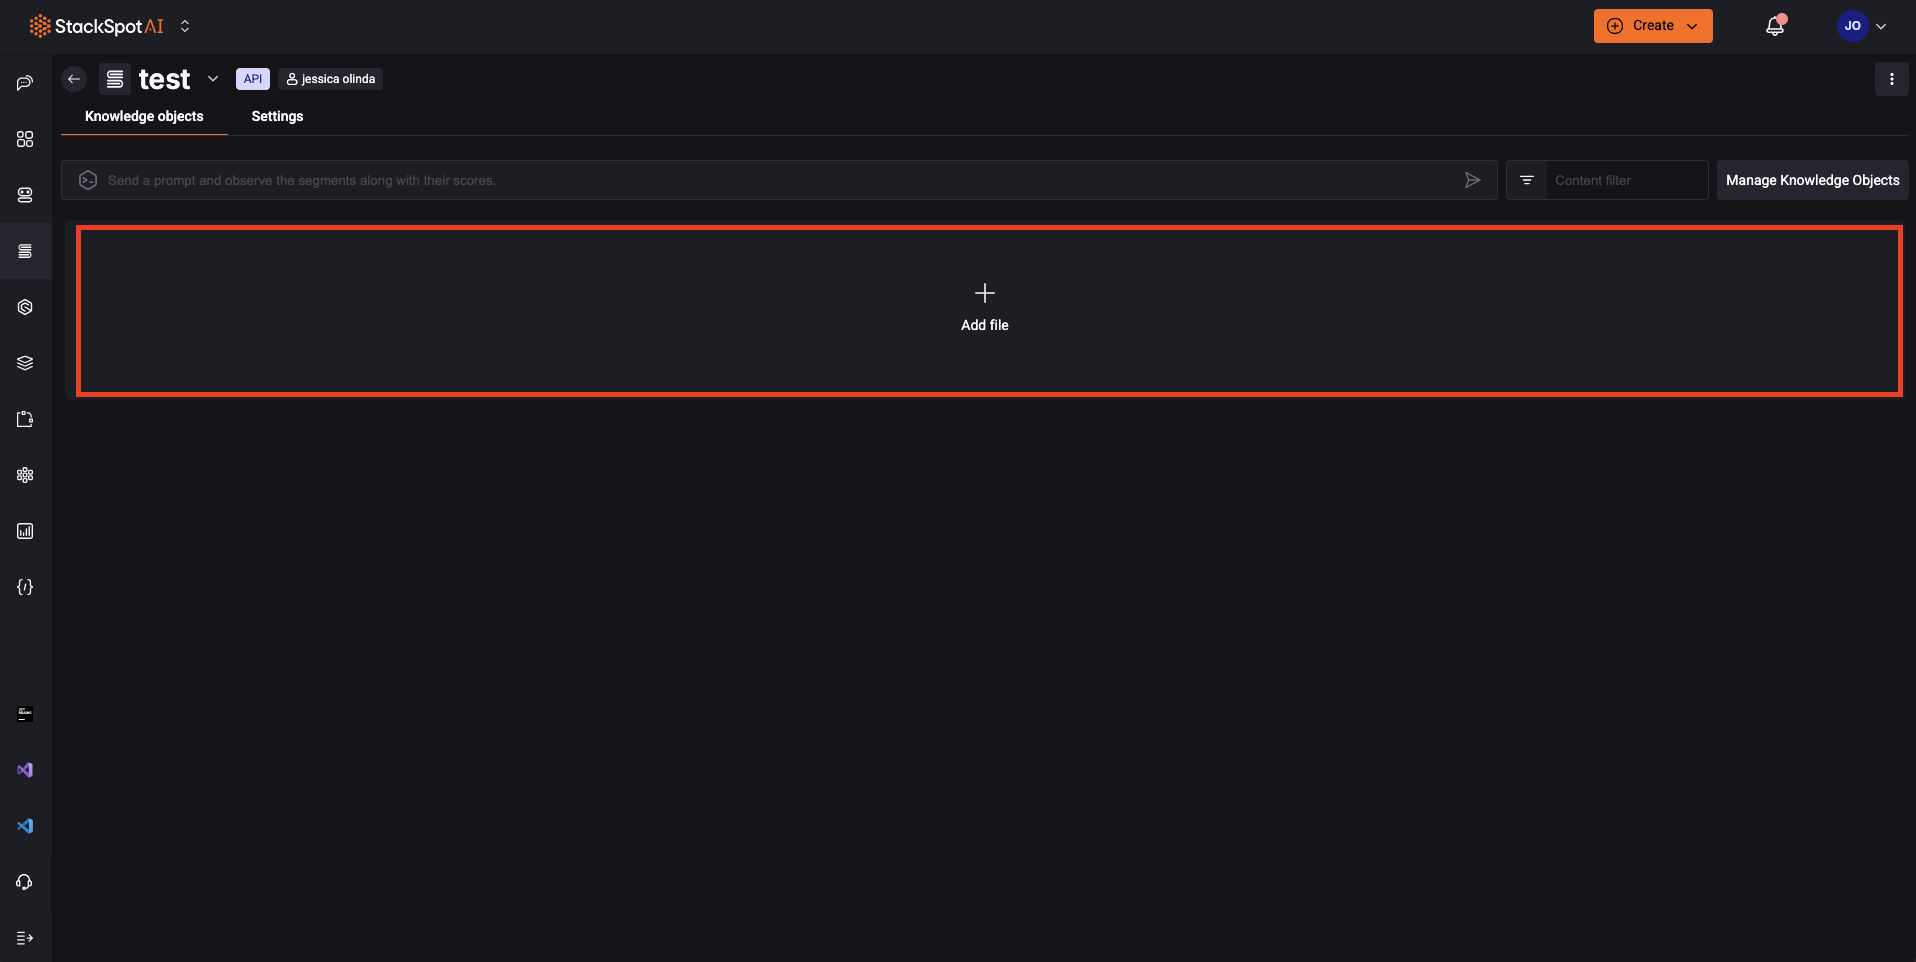
Step 2. On the ‘Knowledge Objects’ tab, click on ‘Add file’:
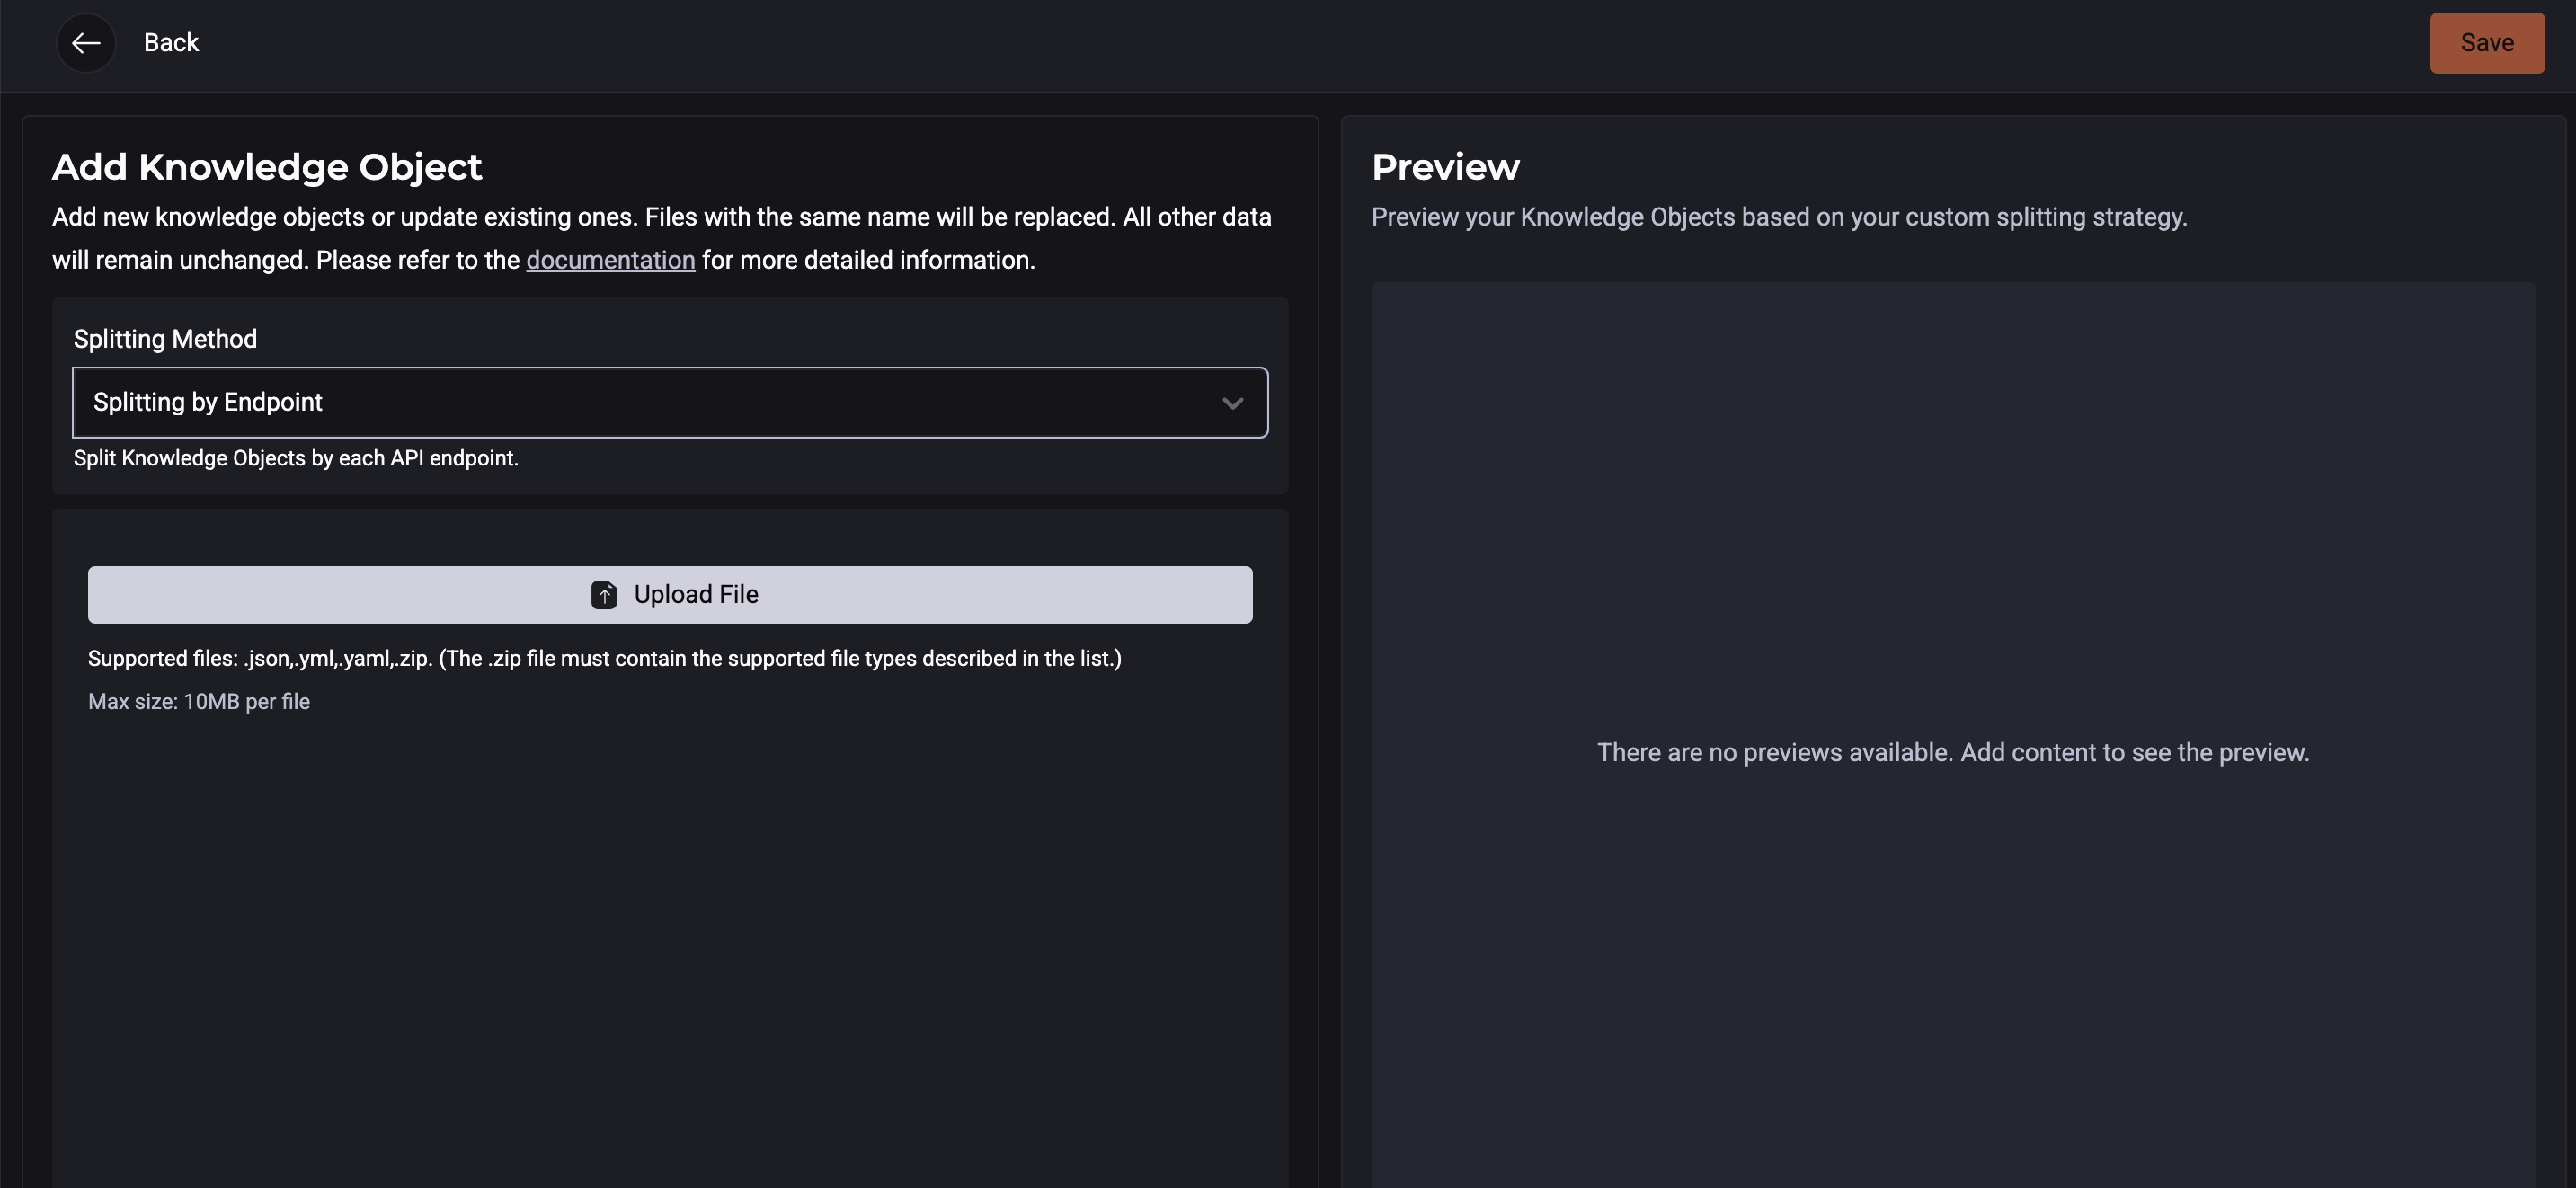
Step 3. Add new Knowledge Objects or update existing ones;
- Splitting method: Choose a method to split the KOs:
- Quantity by endpoint: Divide Knowledge Objects by each API endpoint.
- No Splitting: Keep Knowledge Objects as a single unit without splitting.
If your document is large, there is a chance you may not receive a satisfactory answer.
Step 4. Click Upload file: Choose individual files or zip from your computer;
Step 5. Click ‘Save’;
2. Custom
You can set up your Knowledge Source to store and manage text-based Knowledge Objects using StackSpot AI. There are two ways to add text:
1. Upload a file: Simply upload a text file.
2. Manual Entry: Insert text directly into the platform.
StackSpot AI automatically breaks down the content you add or upload into smaller, more manageable pieces, making it easier to search and navigate. You can effortlessly add, view, and manage these text-based Knowledge Objects.
Follow the steps to create a custom KS:
Step 1. Access the StackSpot AI Portal.
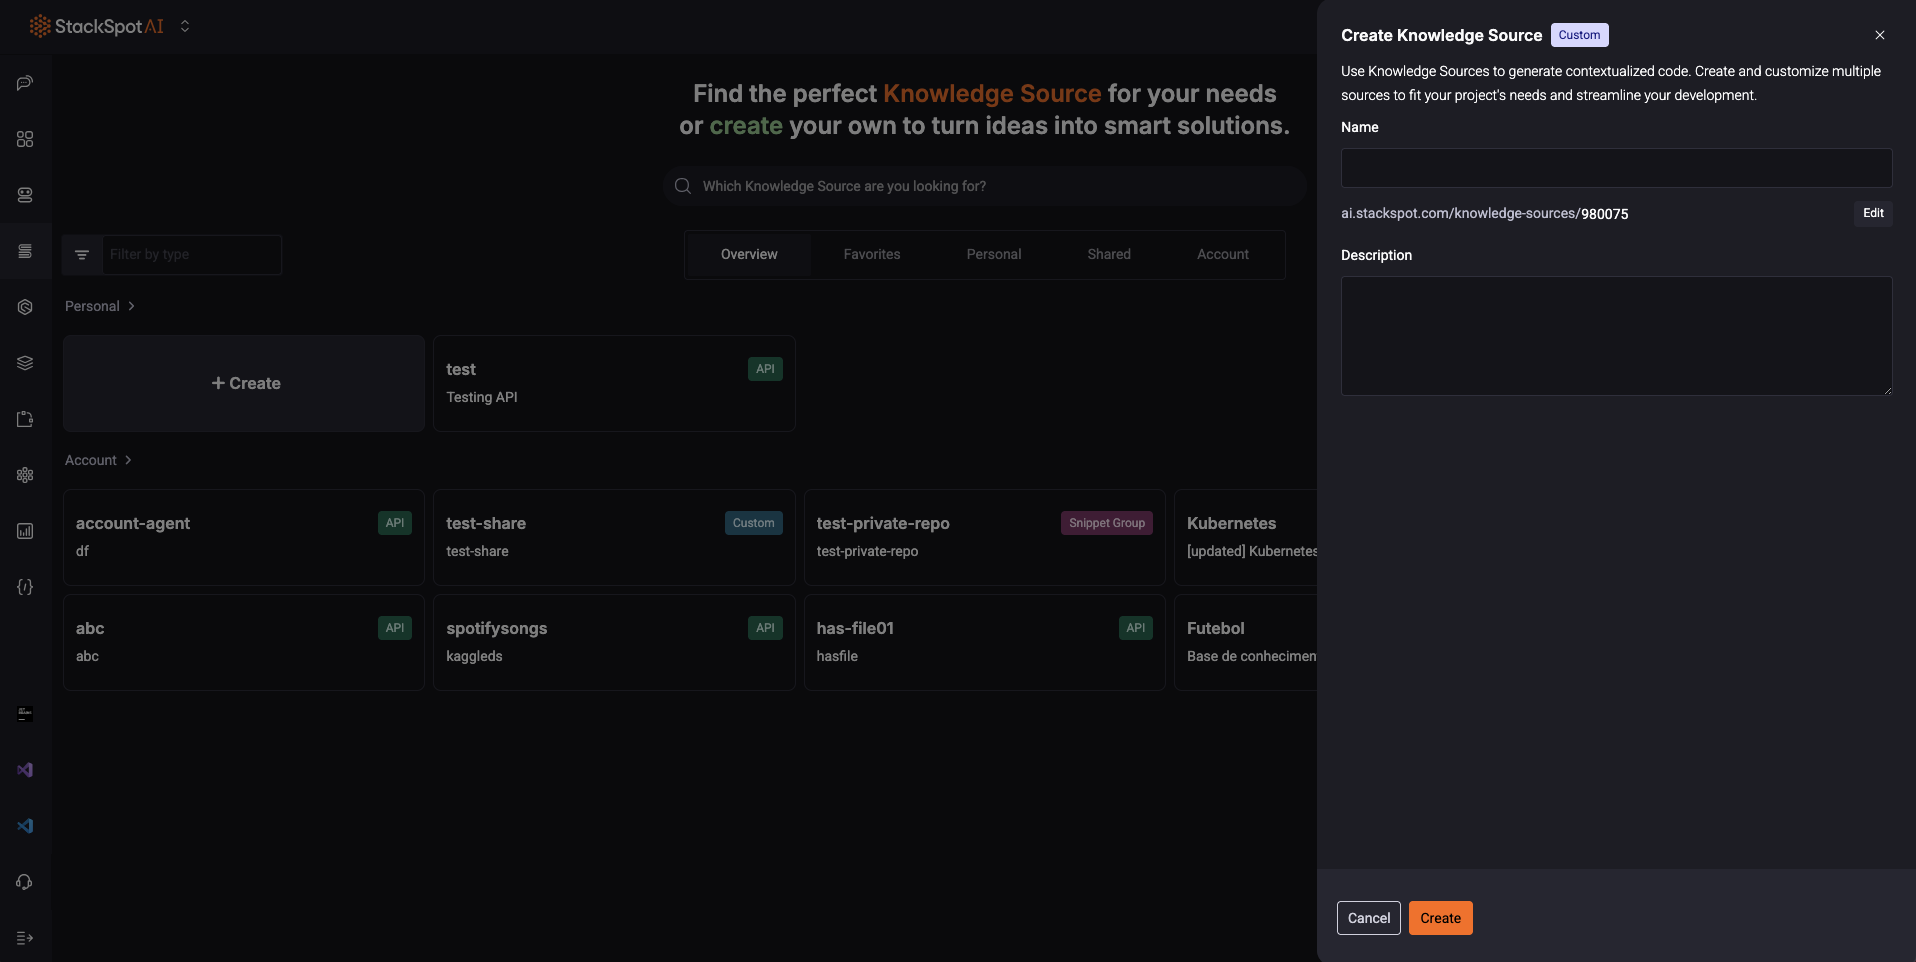
Step 2. Click ‘Knowledge Sources’, then select ‘Create’ and select the ‘Custom’ option;
Step 3. On the Knowledge Source information tab, provide the following details:
- Name: Add a name.
- Identification (Slug): This is your Knowledge Source URL. You cannot edit later.
- Description: Describe what it is about.
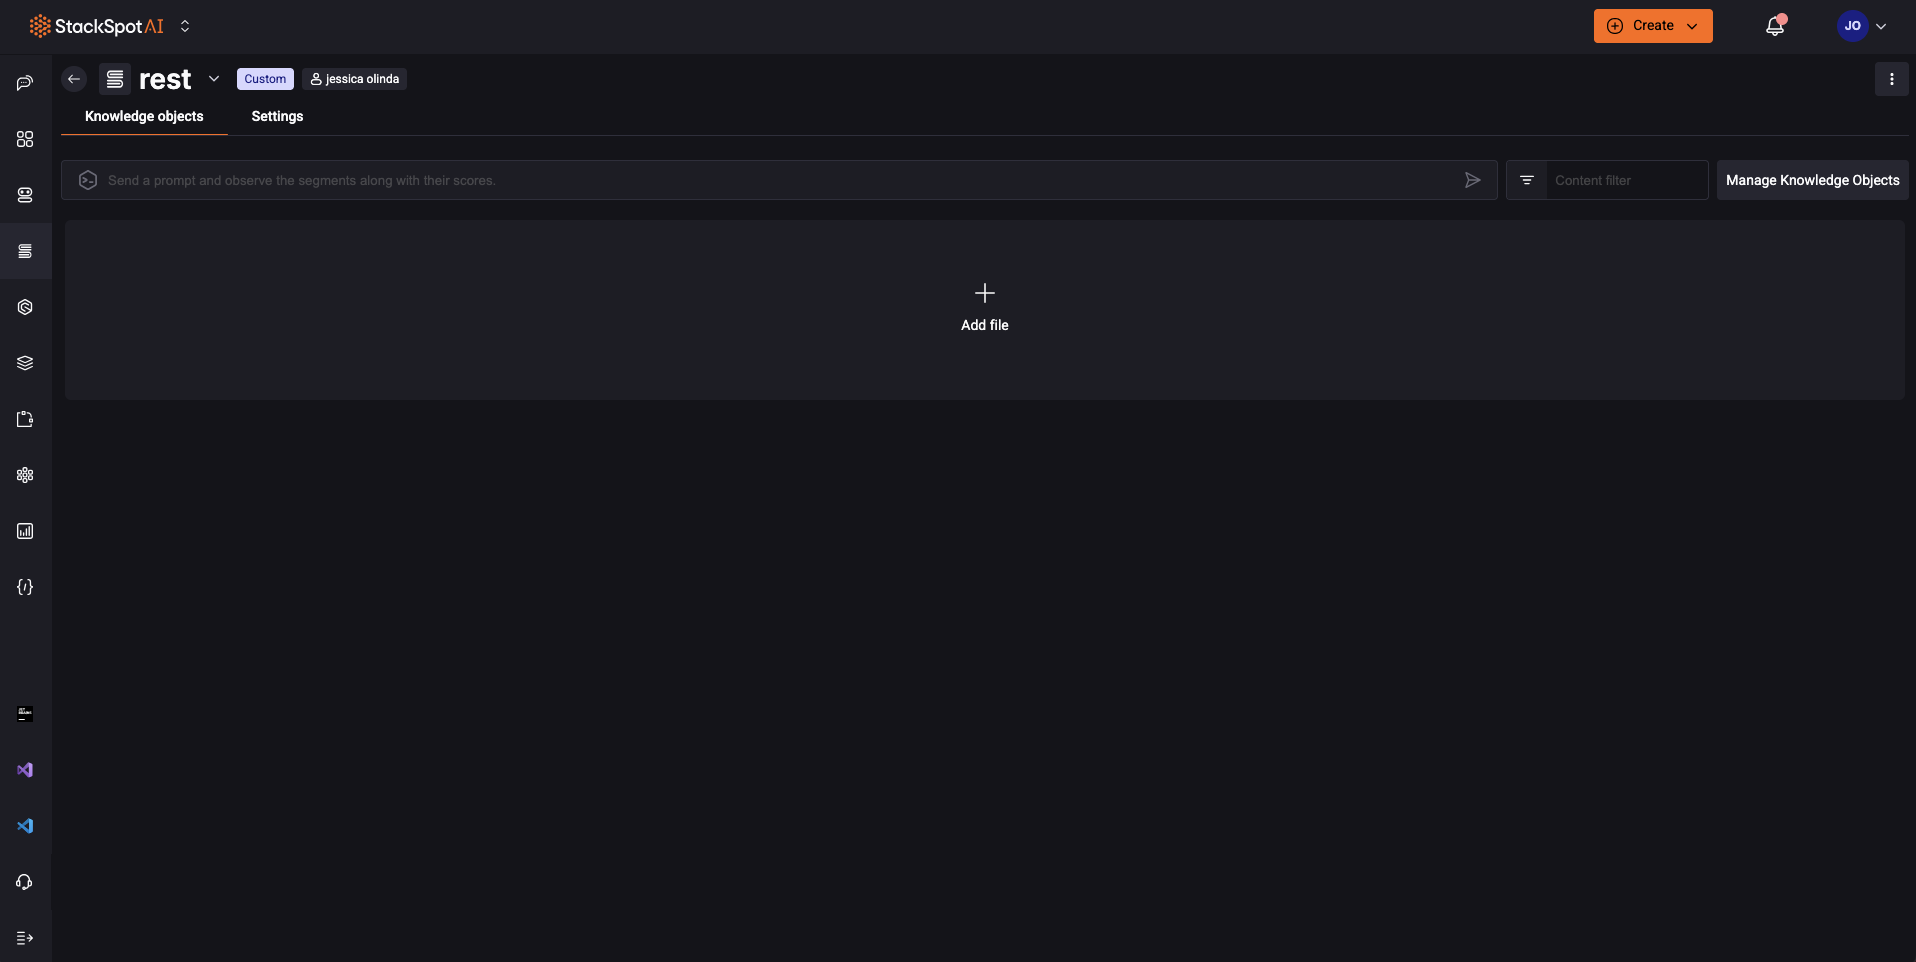
Step 4. On the ‘Knowledge Objects’ tab, click on ‘Add file’.
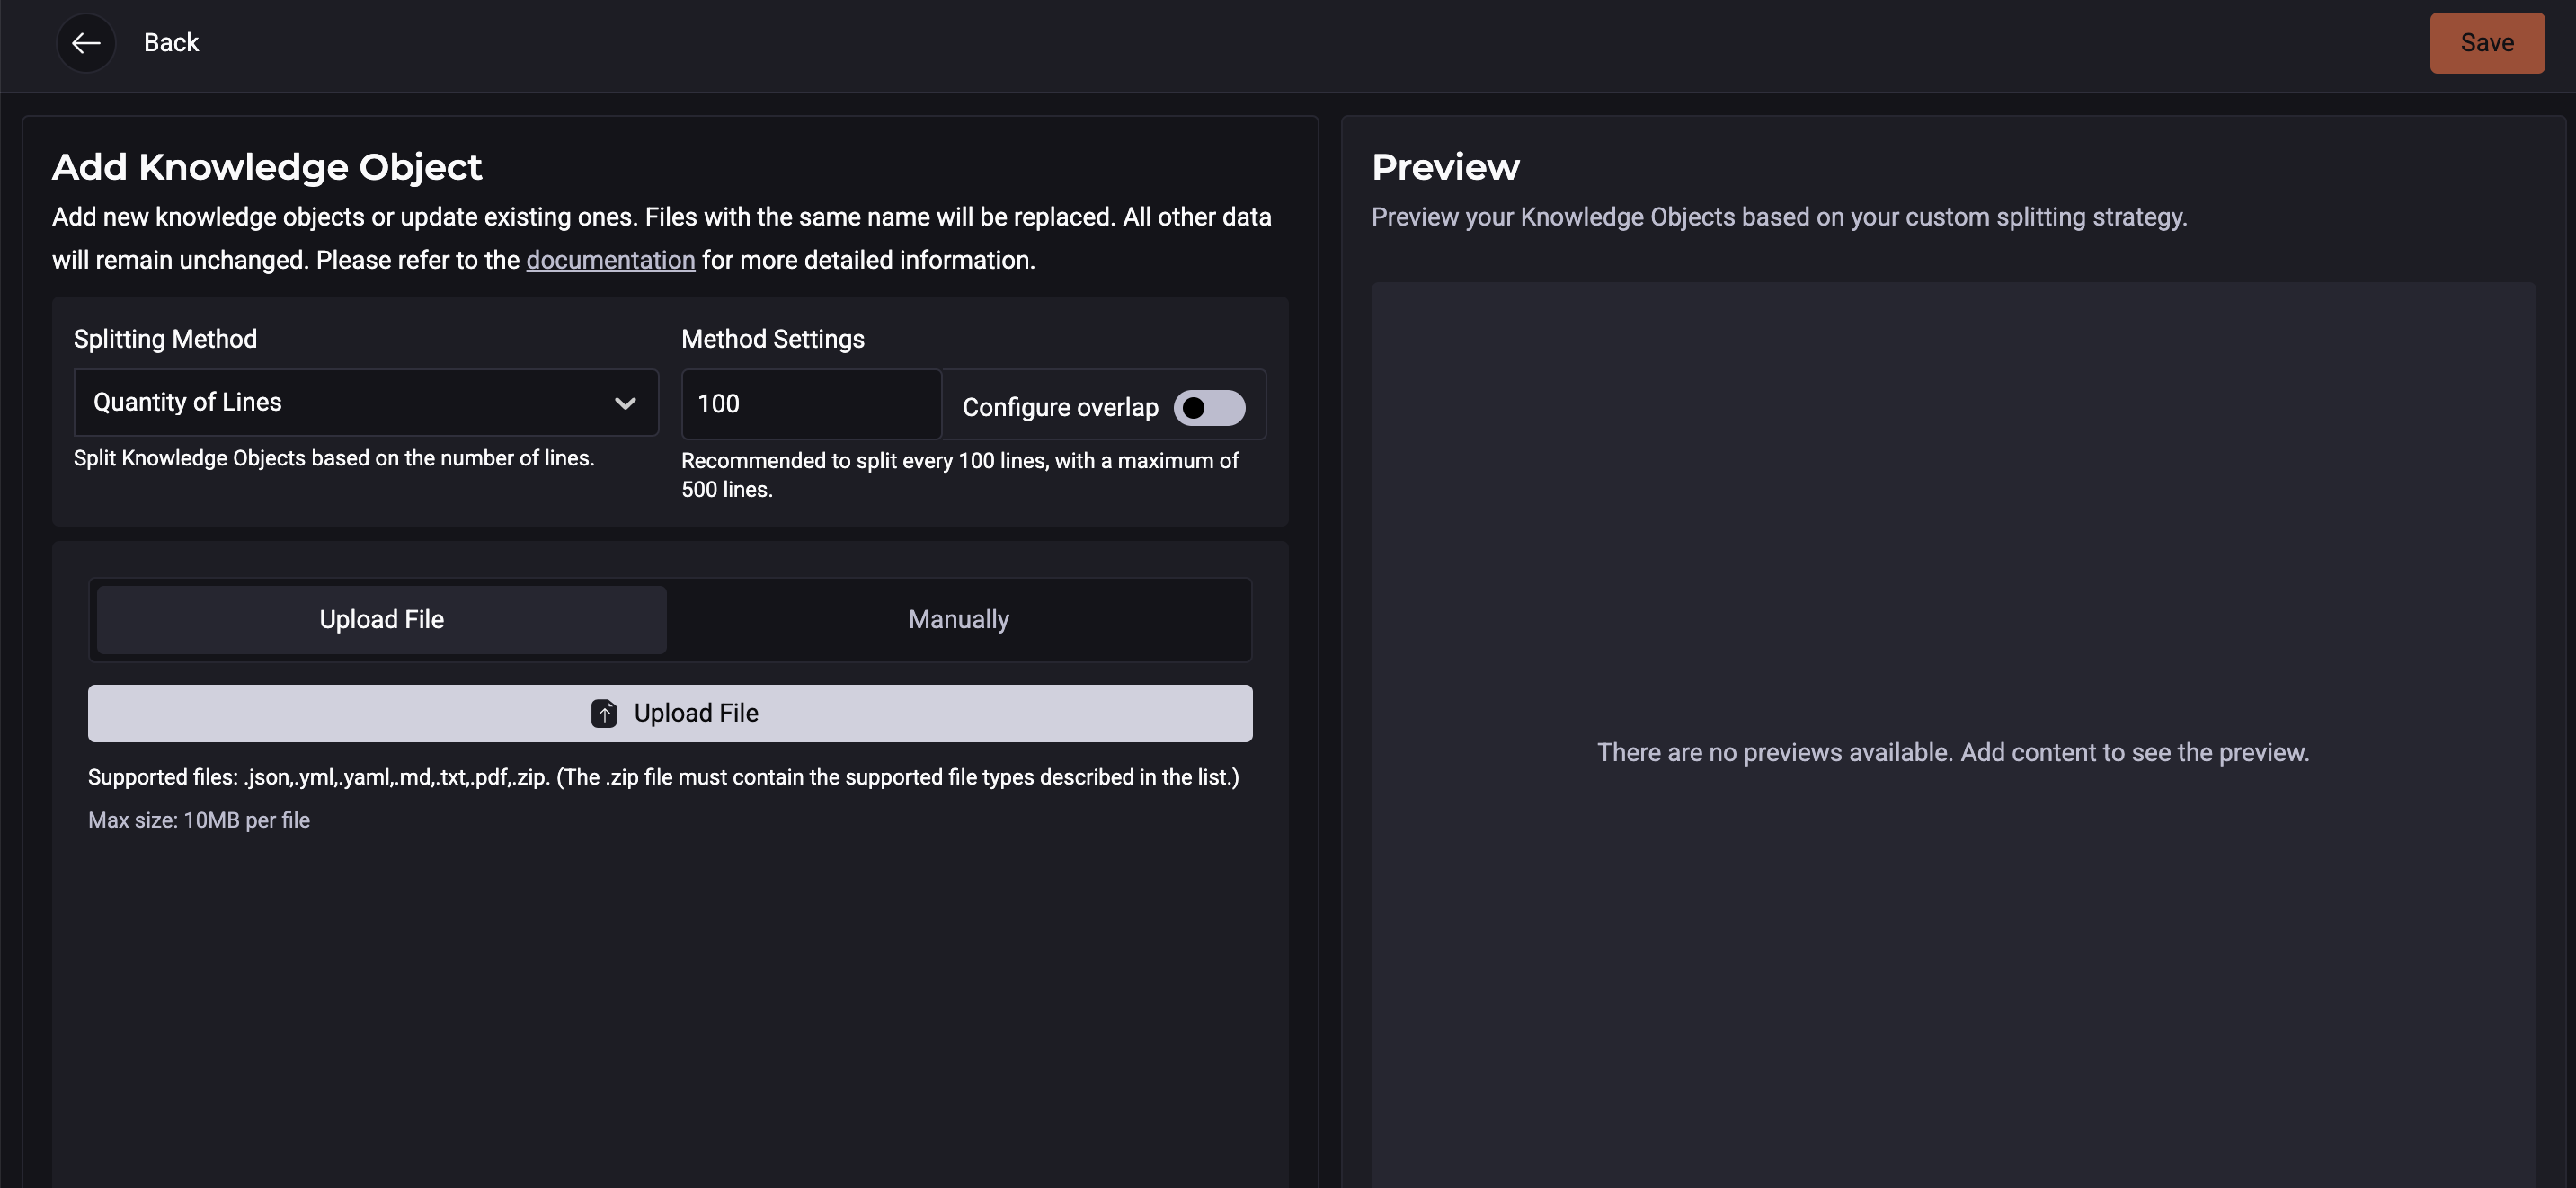
Step 5. Then, Add Knowledge Object:
- Splitting method: Choose a method to split the KOs.
- Quantity of lines: Split the Knowledge Objects based on the number of lines.
- Quantity of Tokens: Split the KOs based on the number of tokens.
- Quantity of Characters: Split the KOs based on the number of characters.
- Syntactic Splitting: Split Knowledge Objects based on syntactic structures.
- No Splitting: Keep KOs as a single unit without splitting.
If your document is large, there is a chance you may not receive a satisfactory answer.
-
Method Settings: It is the chosen method's setting. StackSpot AI will recommend a number for each method. You can change it.
-
Configure overlap: Overlap is a technique for dividing a text into smaller chunks while preserving the contextual integrity between divisions. This method is particularly useful in natural language processing (NLP) tasks and other applications where maintaining text continuity is crucial.
Choose from 0 to 100. You can see an example right beside it.
How does the overlap work?
If you have a document with 1,000 characters, you should divide it into two sections of 500 each. Ensure the information in the first section is also included in the second section. To do this, combine the two sections and add extra details to the first section. Then, decide how much overlap you want between the two sections. For example, if you choose 100 extra characters of overlap, the second section will have 700 characters, including the overlapping part. This overlap gives StackSpot AI more context, helping it provide better answers.
Step 6. Add your files;
You can:
- Upload Files: Choose individual files from your computer. The files can be:
.json,.yml,.yaml,.md,.txt,.pdfor.zip.
The Knowledge Objects you add as files will appear with a 'Uploaded File' tag.
- Manually: Copy and paste your desired content.
The Knowledge Objects you add manually will appear with a 'Standalone' tag.
Step 7. Click ‘Save’;
3. Snippets Group
It is a suggested code example. It can be a pattern. You can use it to help LLM learn about your business rules or code style.
The StackSpot AI has a method of breaking down code snippets while creating Knowledge Sources. It aims to conserve tokens, reduce prompt overflow, and eliminate unnecessary whitespace.
Follow the steps below:
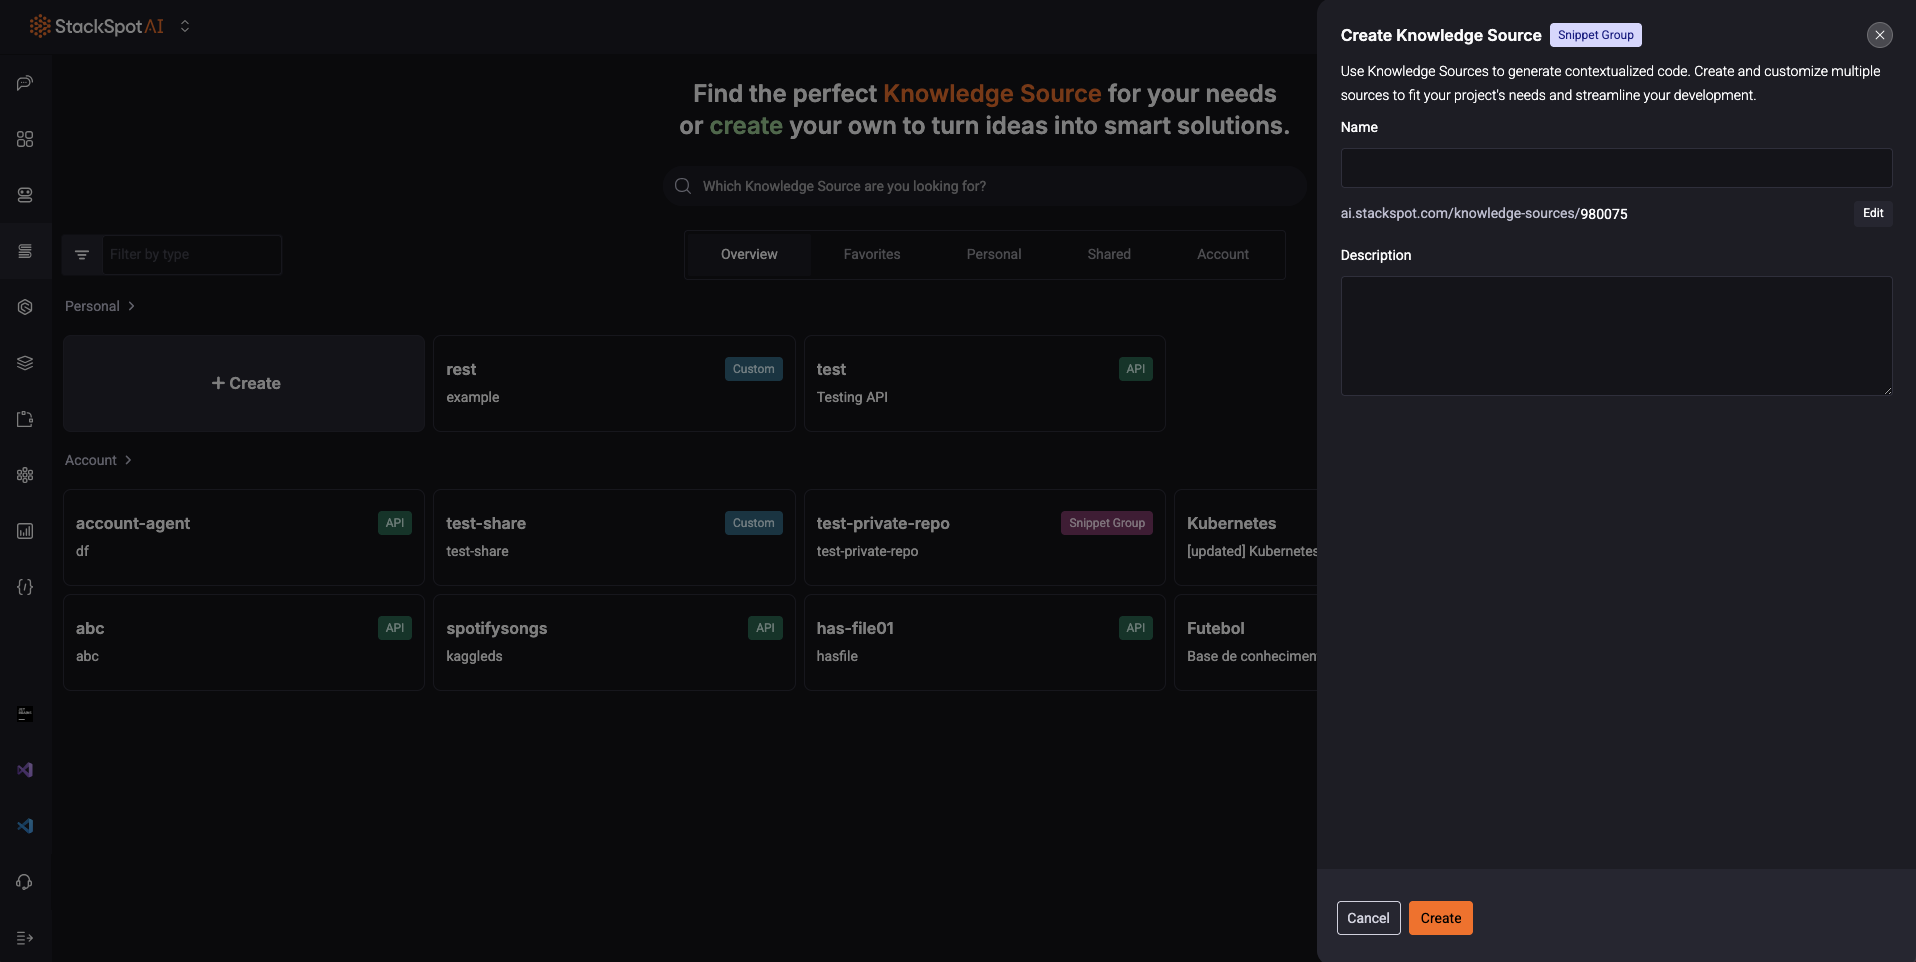
Step 1. Go to the ‘Knowledge Source Information’ tab, add:
- Knowledge Source: Add a name.
- Identification (Slug): This is your Knowledge Source URL. You cannot edit later.
- Description: Describe what it is about.
Click ‘Next’;
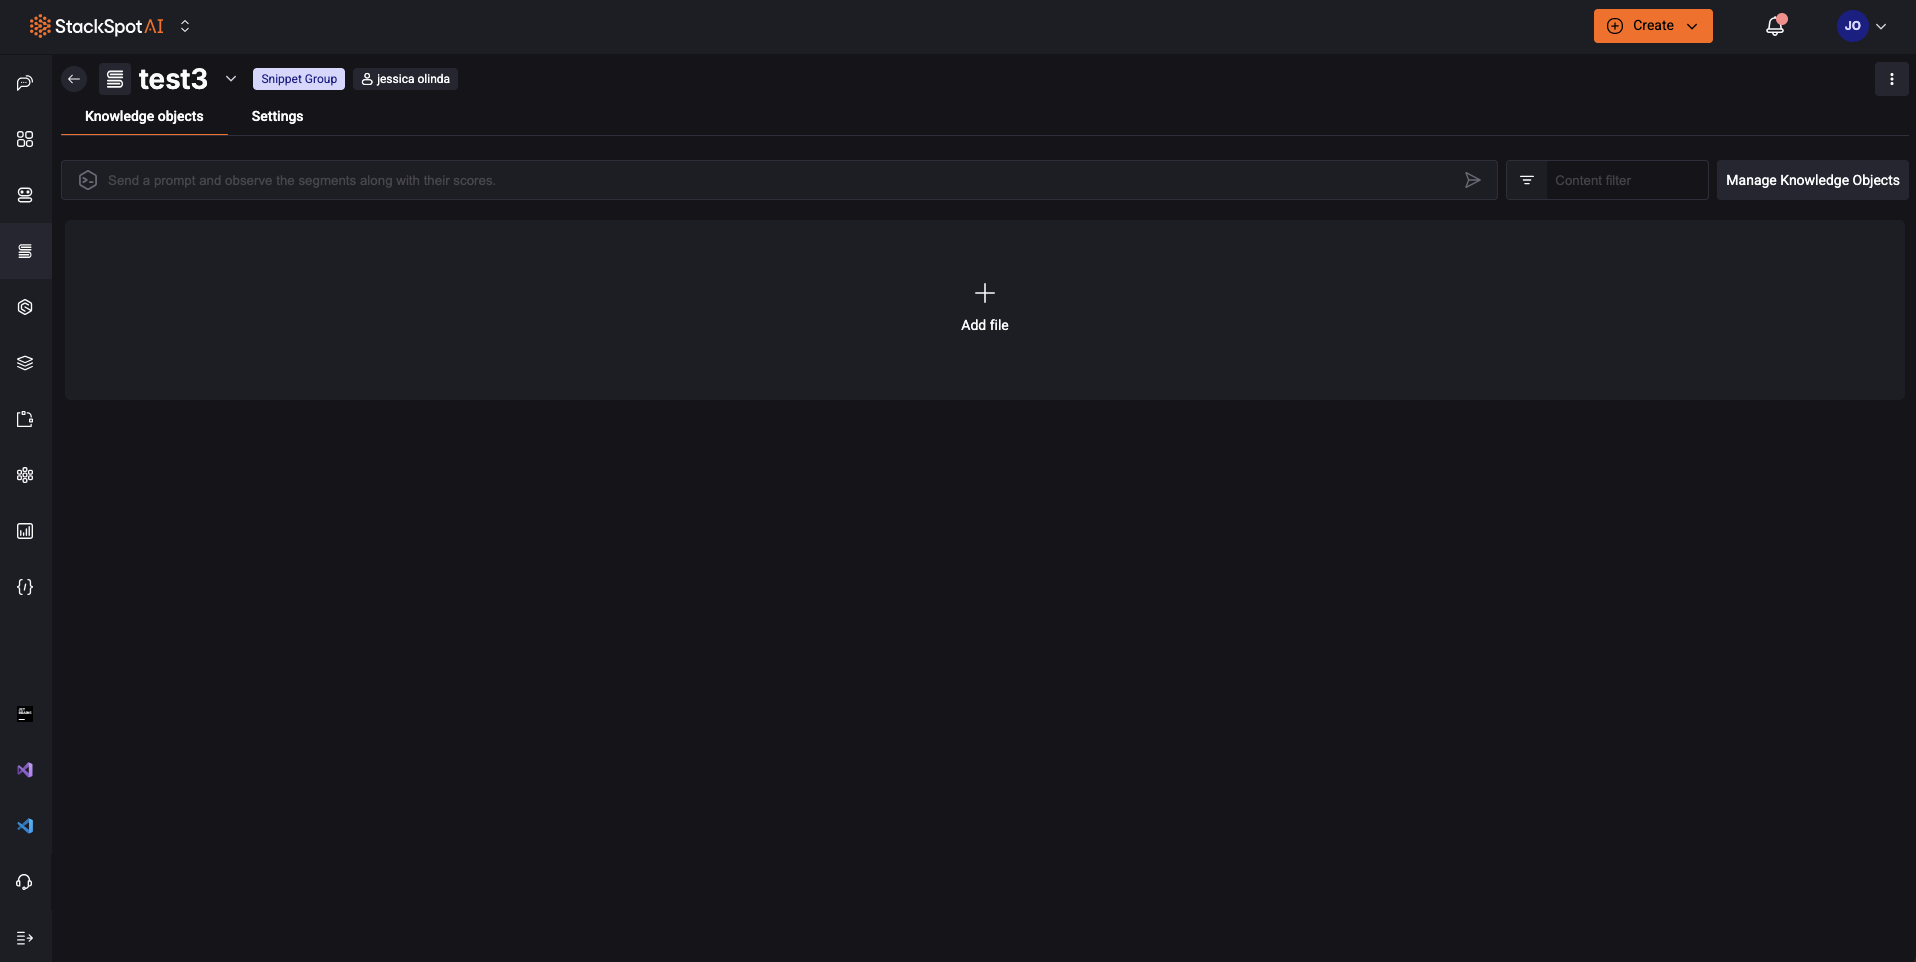
Step 2. On the ‘Knowledge Objects’ tab, click on ‘Add file’.
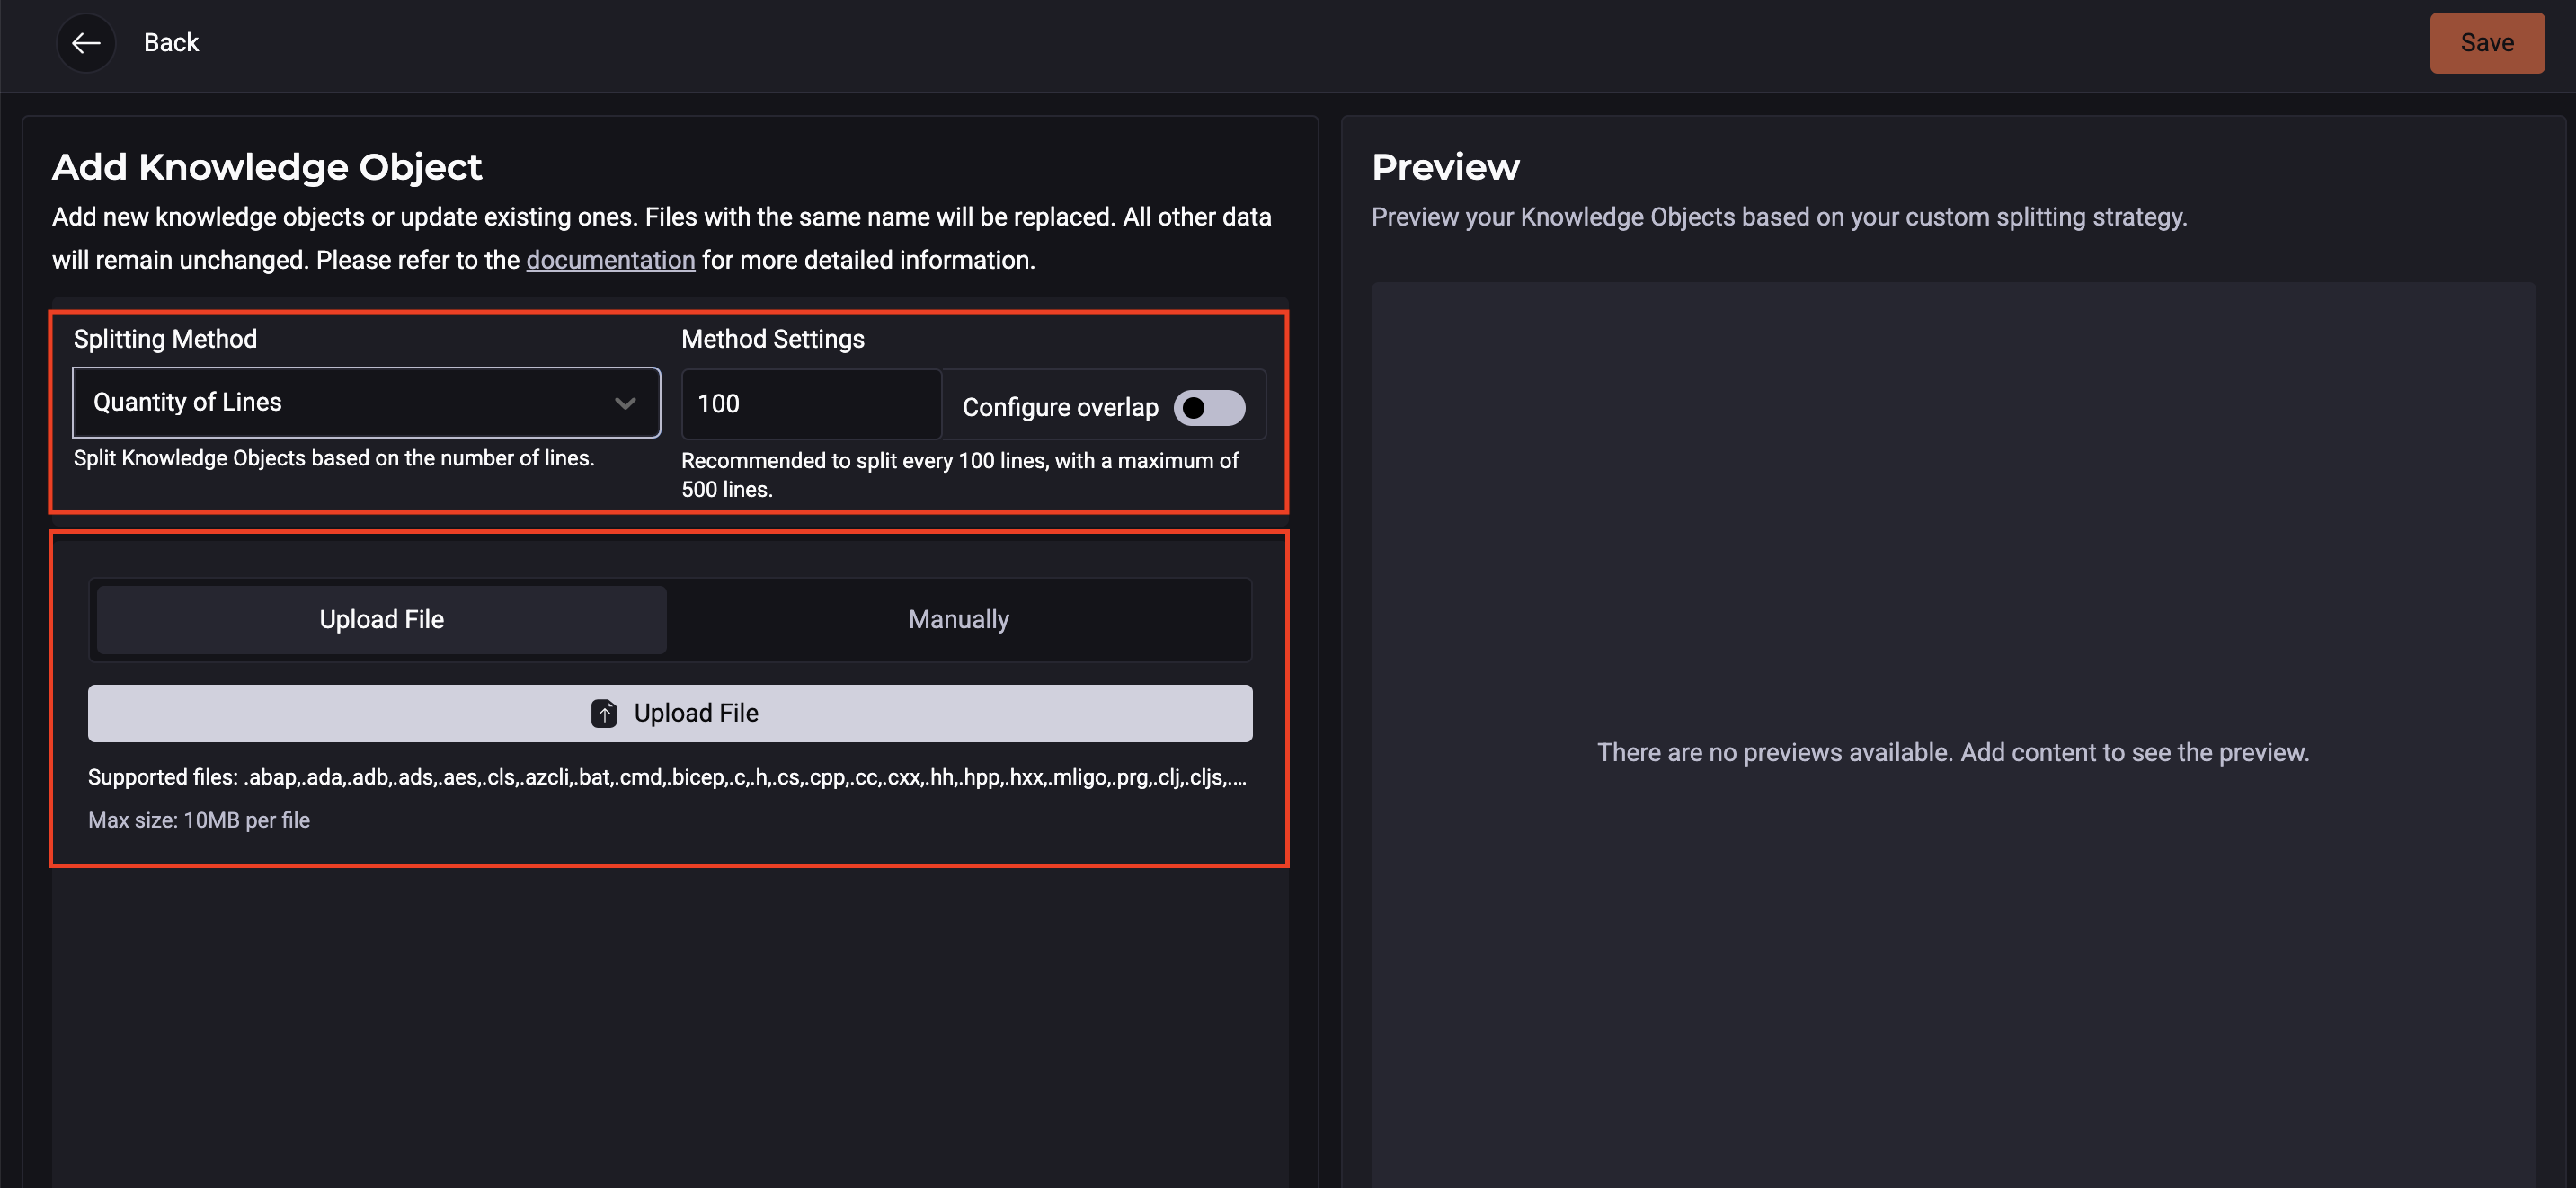
Step 3. Then, Add Knowledge Object:
- Splitting method: Choose a method to split the KOs:
- Quantity of lines: Split the Knowledge Objects based on the number of lines.
- Quantity of Tokens: Split the KOs based on the number of tokens.
- Syntactic Splitting: Split Knowledge Objects based on syntactic structures.
- No Splitting: Keep KOs as a single unit without splitting.
If your document is large, there is a chance you may not receive a satisfactory answer.
-
Method Settings: It is the chosen method's setting. StackSpot AI will recommend a number for each method. You can change it.
-
Configure overlap: Overlap is a technique for dividing a text into smaller chunks while preserving the contextual integrity between divisions. This method is particularly useful in natural language processing (NLP) tasks and other applications where maintaining text continuity is crucial.
Choose from 0 to 100. You can see an example right beside it.
Step 4. Add your files;
You can add Knowledge Objects to your KS:
- Upload Files: Choose individual files from your computer. The files can be:
.abap,.ada,.adb,.ads,.aes,.asp,.aspx,.cls,.azcli,.bat,.cmd,.bicep,.c,.h,.cs,.cpp,.cc,.cxx,.hh,.hpp,.hxx,.mligo,.clj,.cljs,.cljc,.edn,.cob,.cbl,.coffee,.csp,.css,.d,.dart,.dockerfile,.ecl,.ex,.exs,.erl,.hrl,.fs,.fsi,.ml,.mli,.flow,.f90,.f,.for,.f77,.ftl,.go,.graphql,.gql,.groovy,.gvy,.gy,.gsh,.handlebars,.hbs,.hs,.hcl,.tf,.html,.htm,.ini,.java,.js,.mjs,.jsx,.json,.jl,.kt,.kts,.less,.lex,.liquid,.lua,.m3,.md,.dax,.asm,.sql,.m,.pas,.pp,.ligo,.pl,.pm,.php,.pla,.txt,.dats,.sats,.hats,.pq,.ps1,.psm1,.psd1,.proto,.pug,.py,.qs,.r,.rkt,.cshtml,.redis,.rst,.rb,.rs,.sb,.lisp,.scala,.scm,.scss,.sh,.sol,.rq,.st,.swift,.sv,.tcl,.twig,.ts,.tsx,.vb,.v,.xml,.yaml,.yml,.zip.
The Knowledge Objects you add as files will appear with a 'Uploaded File' tag.
- Manually: Copy and paste your desired content.
The Knowledge Objects you add manually will appear with a 'Standalone' tag.
Step 5. Click ‘Save’. You can add more Knowledge Objects later;
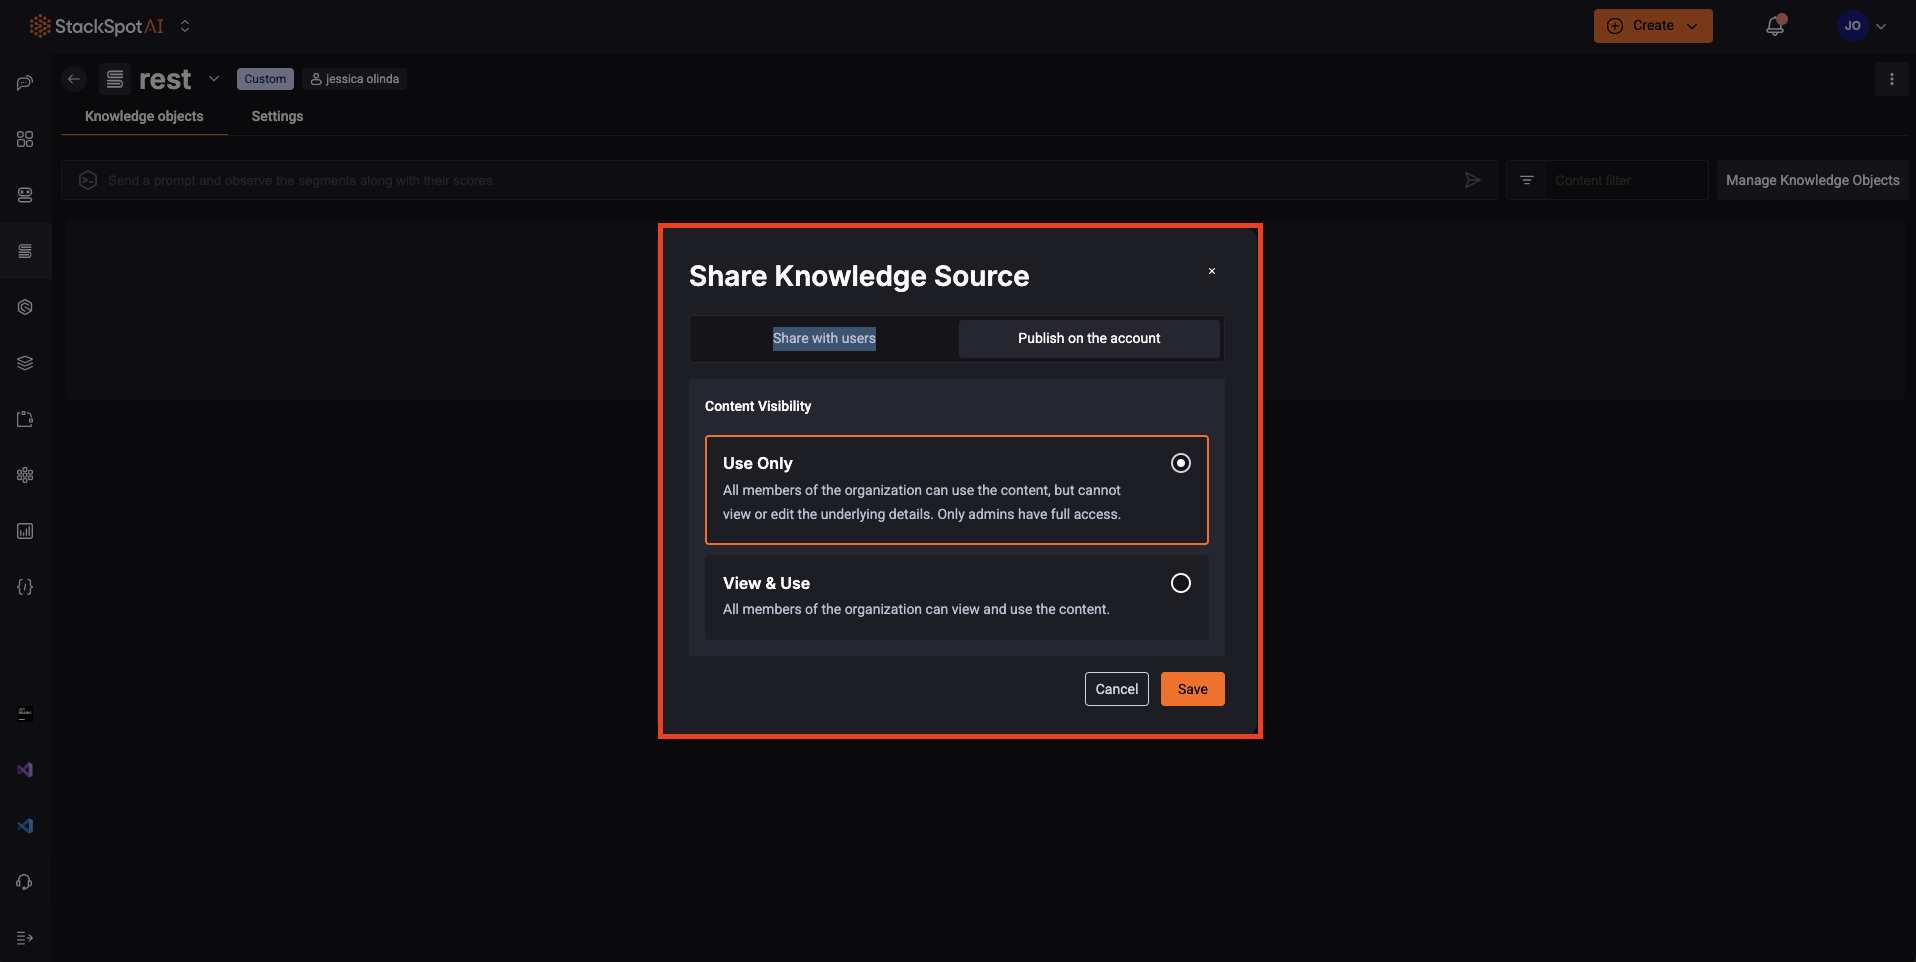
Share your Knowledge Source
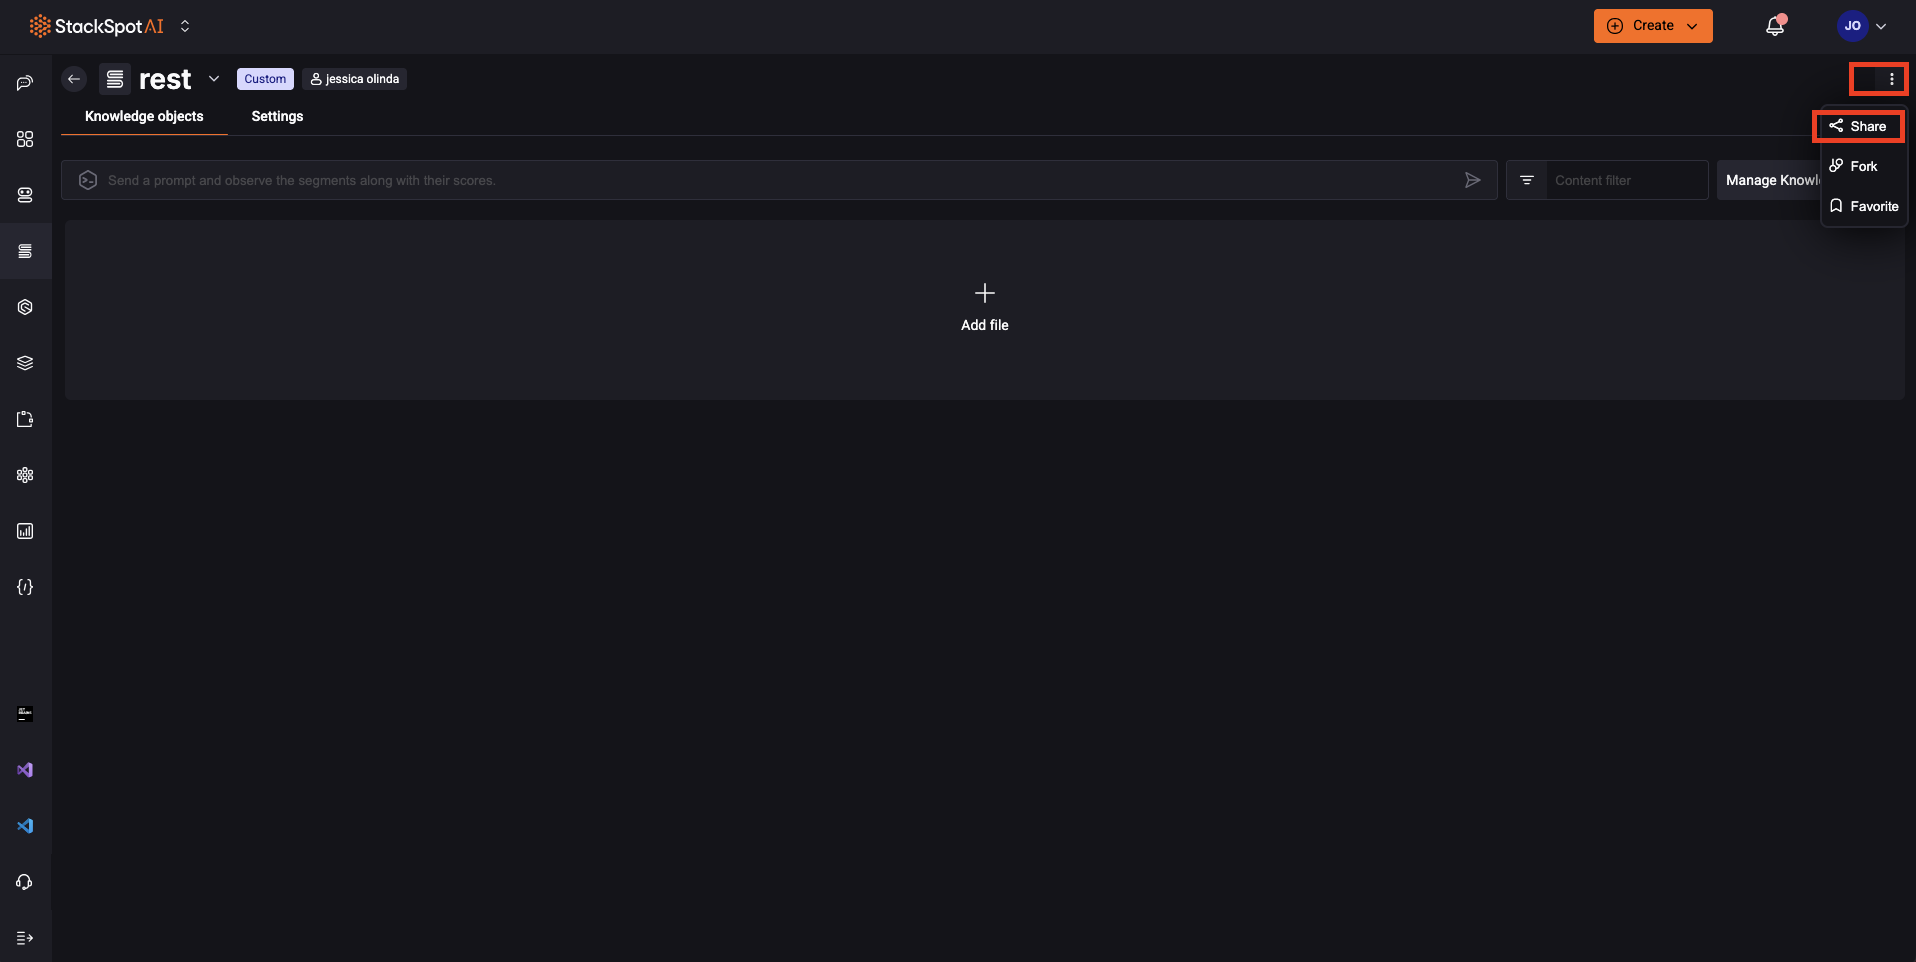
- Share with users: add the email to invite others:
- Read or to Write (the person can edit).
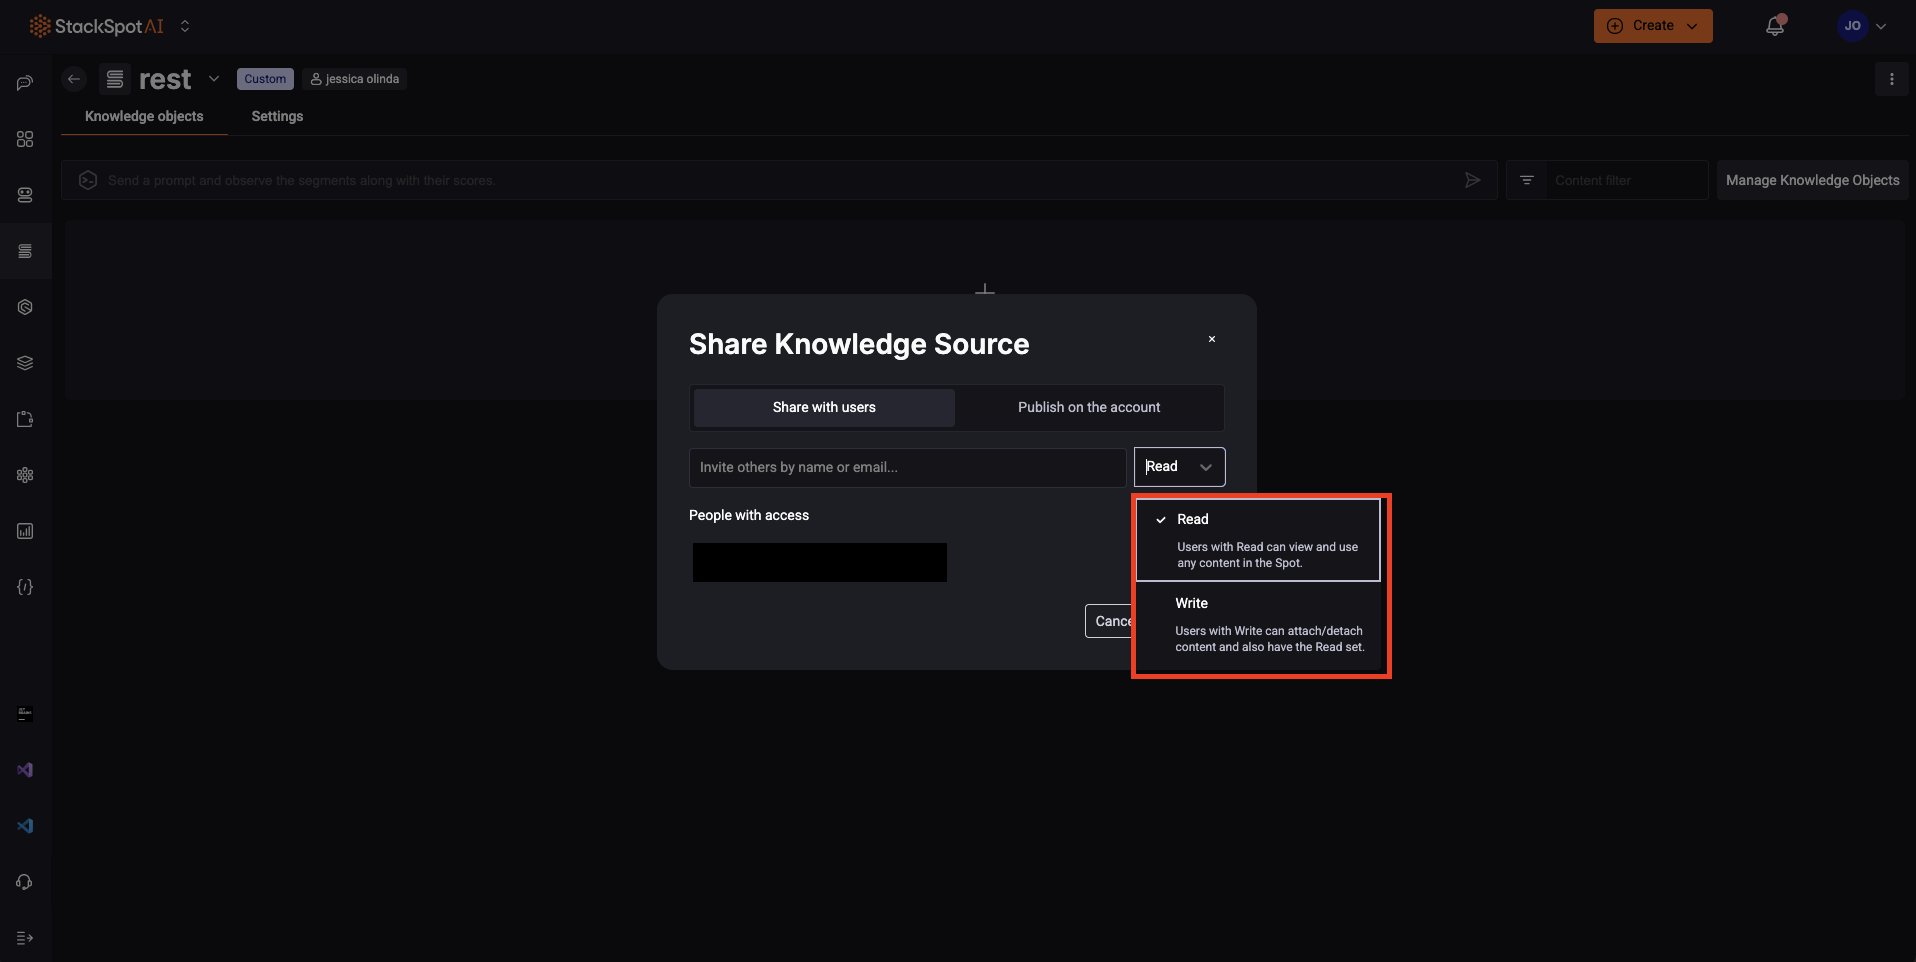
-
Publish on the account:
- Use Only: All organization members can use the content, but cannot view or edit the underlying details. Only admins have complete access.
- View & Use: All organization members can view and use the content.
