Create Toolkits
You can integrate your tools with StackSpot AI using OpenAPI or Swagger specifications. By doing this, your APIs become available to StackSpot AI Agents, allowing them to interact directly with external systems and any HTTP API.
This integration expands Agents' capabilities, enabling them to fetch real-time information and perform actions beyond the language model’s built-in capabilities.
There are two Toolkit options:
- Web Request
- MCP
Why use this integration?
Registering your APIs with OpenAPI/Swagger empowers Agents to connect with external services, access up-to-date data, and automate complex tasks. This ensures your Agents can deliver more accurate answers and handle advanced scenarios that require real-time information or custom operations.
Create Toolkit: Web Request
The Toolkit reunites all the tools in one place. You can create custom Tools to meet the specific needs of your project.
The Web Request toolkit includes specifications like OpenAPI or Swagger to allow the assistant to suggest ready-to-use code. Use this feature to streamline communication with external services and ensure compliance with established standards.
Follow the steps below to create:
Step 1. Access the StackSpot AI Portal;
Step 2. Click on the Toolkit section;
Step 3. Click the ‘Create Toolkit‘ button. Select the Web Request option. Add the following information:
- Name: Add a Toolkit name.
- Toolkit description: Describe what your Toolkit is about.
- Toolkit logo: Add a logo (Optional).
Then, click the ‘Create‘ button.
Step 4. Set up your Tool functions. Click the ‘Add Tools‘ button;
Step 5. You have two options to register your Tools:
Option 1. Upload Files: Swagger/OpenAPI
Follow the instructions to add a Tool to request your specific endpoint:
This option is only available through internet access services.
- Click on drop items or browse files;
- Choose your YAML Open API;
- StackSpot AI processes the files;
- For each endpoint you have in your Swagger, StackSpot AI creates a tool. They are services, and you can see the:
- Tool name
- Method: GET, POST, DELETE
- Tool description
- URL
- Parameters: You add the input parameters to call the service you want.
The syntax follows the OpenAPI convention. It can be the following types:
-
Header: A parameter passed in the HTTP headers
-
Path: A parameter included in the URL path
-
Query: A parameter annexed to the URL after the ?
-
Query for URL
/states?size={size_number}:
parameters:
  - in: query
    name: size
    schema:
      type: integer
- Path for URL
/users/{id}:
  parameters:
        - name: id
          in: path
          description: User ID
          required: true
- Header:
     parameters:
        - in: header
          name: Content-Type
          schema:
            type: string
          required: true
The syntax follows the Open API convention. It can be a JSON.
- Request Body:
requestBody:
        required: true
        content:
          application/json:
            schema:
              type: object
              required:
                - name
                - age
              properties:
                name:
                  type: string
                age:
                  type: integer
                  format: int32
                breed:
                  type: string
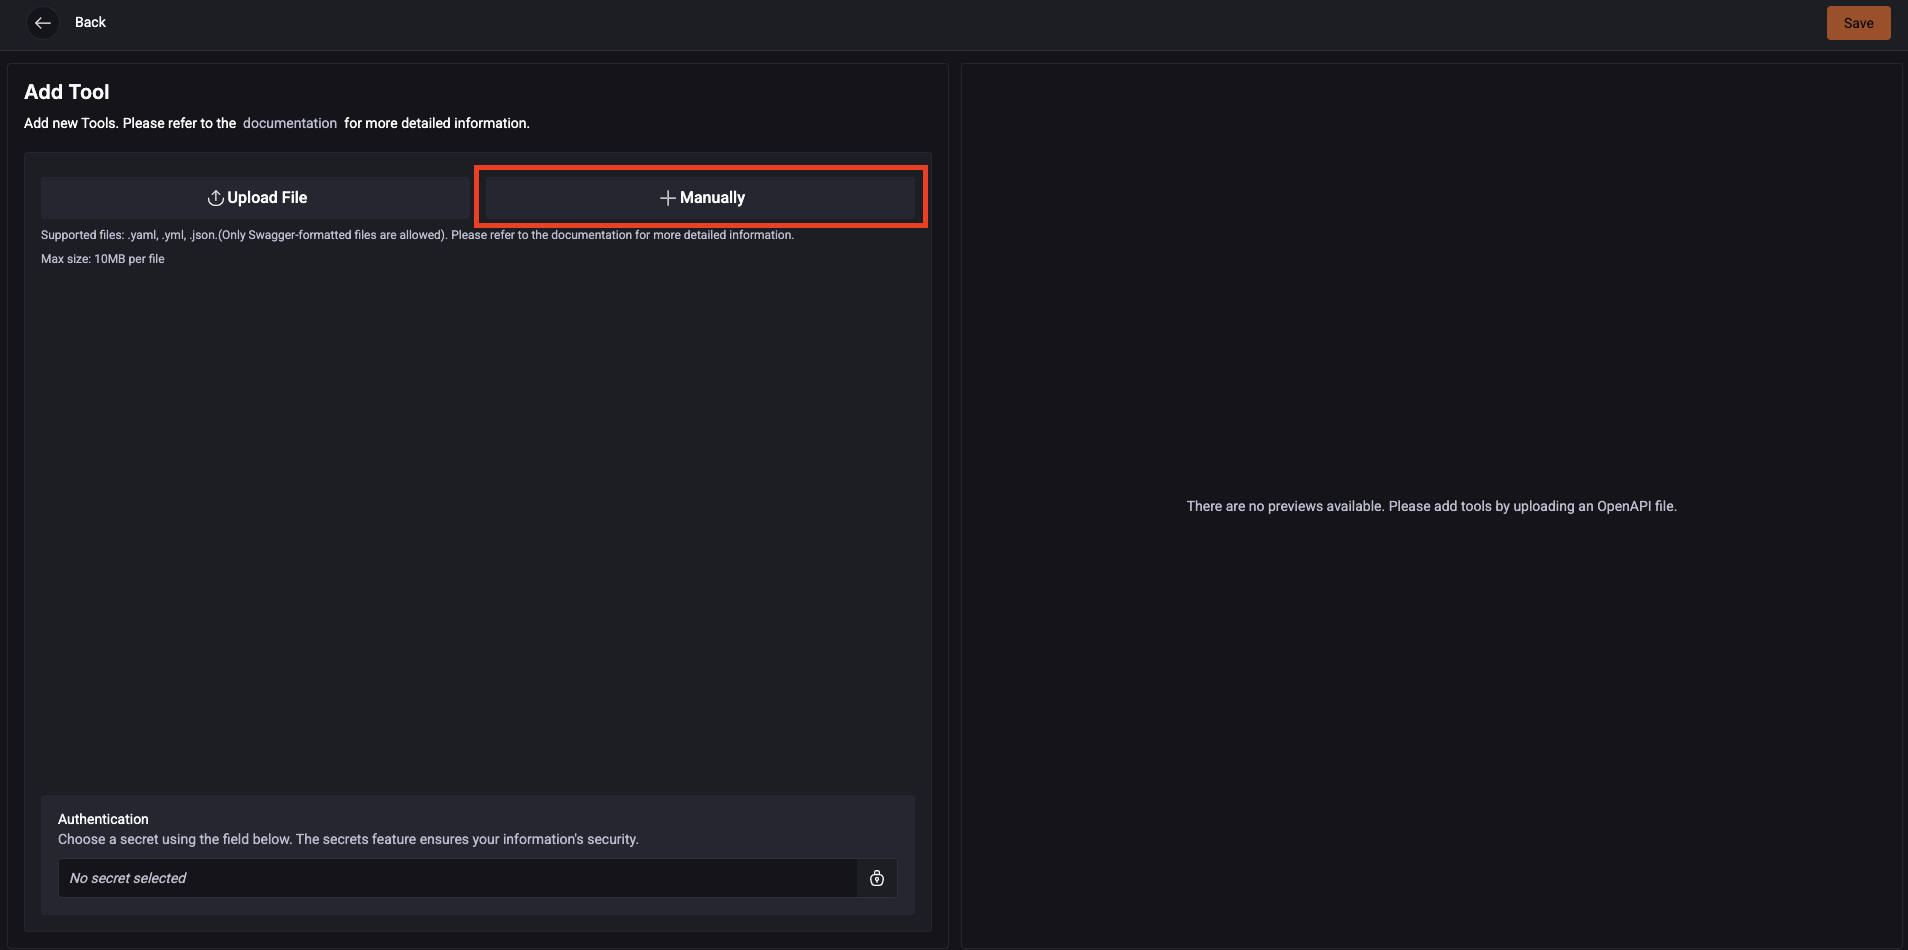
Option 2. Manually
You can add the endpoints manually. You must fill out the fields:
-
Name: Enter a name for the tool;
-
Tool Description: Explain the purpose of your tool. This field is important because it helps the Agent decide whether or not to use this tool in specific situations.
-
HTTP Method: Select the HTTP method (GET, POST, PUT, DELETE, etc.) to be used;
-
Invocation URL: Specify the URL that will be called to execute the function;
-
Parameters: List the parameters accepted by the function, including:
- Parameter name;
- Type (string, integer, etc.);
- Location (header, path, query, etc.);
- Parameter description;
- The value of this field must be a JSON and follow the OpenAPI specification.
For more information, see the official OpenAPI documentation.
- The value of this field must be a JSON and follow the OpenAPI specification.
Example:
Notes:
The "in" field defines the parameter's location (path, header, query, etc.).
The "schema" field defines the parameter's type according to OpenAPI 3.0.
All fields follow the structure expected by the OpenAPI Specification.Example of filling in the Tool parameters.[{"name": "userId","in": "path","description": "User ID","required": true,"schema": {"type": "integer"}},{"name": "X-Request-Id","in": "header","description": "Unique request identifier","required": false,"schema": {"type": "string"}},{"name": "active","in": "query","description": "Filters active users","required": false,"schema": {"type": "boolean"}}] -
Request Body: Describe the structure of the request body, if necessary. Include the fields and types (for example, string, integer, object), and explain the purpose of each one. Use this field to define the payload for POST, PUT, or PATCH requests.
- The value of this field must be a JSON and follow the OpenAPI specification.
For more information, see the official OpenAPI documentation.
- The value of this field must be a JSON and follow the OpenAPI specification.
Example:
Notes:
name (string): User's full name (required).
email (string, format email): User's email address (required).
age (integer): User's age (optional).
This example can be used as the value of the requestBody field in a POST, PUT, or PATCH operation in your OpenAPI specification.{
  "description": "Payload to create a new user",
  "required": true,
  "content": {
    "application/json": {
      "schema": {
        "type": "object",
        "properties": {
          "name": {
            "type": "string",
            "description": "User's full name."
          },
          "email": {
            "type": "string",
            "format": "email",
            "description": "User's email address."
          },
          "age": {
            "type": "integer",
            "description": "User's age."
          }
        },
        "required": ["name", "email"]
      }
    }
  }
}
Fill in all fields carefully. This will help ensure that the integration works correctly.
See an example below:
5. Enable response transformation: Large Language Models (LLMs) have a context window that determines the number of tokens a user can send to them. Some services provide responses containing significant information; for example, aggregating news from Google can generate more than your token limits allow. To address this, when you enable the relevant option, StackSpot AI uses Jinja to condense the extensive response into a more manageable size, ensuring you do not exceed your token limits.
Enable this so the models see the transformed response. You can also see the transformed values in the detailed steps.
- See an example below:
status_code: int
"headers": dict[string, string]
"raw_data": string
"json": dict[string, any]
- API Response Body example:
{
"id": 1,
"name": "Stackspot",
"order": 4,
"foo": "bar"
}
When the API response is successful (status 200), you can simplify the process by using only the order field from the response JSON.
{% if response.status_code == 200 %}{{ response.json.order }}{% else %}Error: {{ response.raw_data }}{% endif %}
For more details about Jinja, see the Using Jinja in Toolkit page.
Step 6. Most services need to authenticate, so click the ‘Authentication‘ button and follow the instructions.
You can choose an existing secret or create a new one. Click to learn the steps
Choosing an existing one
- In the Authentication section, click the 'Secret' button.
- Choose Organization or Personal for the Secret Storage Location.
- Select the Credential Type (API Key, Client Credentials or Key/Value) and then choose a Secret name.
If you don’t use a Secret for 30 days, it will automatically become inactive.
Create a Secret
Step 1. Add Secret Storage Location:
- Choose an Organization for your company´s secret
- Personal for your secret.
Step 2. Choose a Credential Type and add the following information:
-
API Key
- Add a Secret name;
- Add a header name and value;
- Add an expiration date. It is optional.
-
Client Credentials (OAuth)
- Add the URL
- Add the Client ID
- Add the Client secret
- Add Scopes (optional)
Using Client Credentials allows for secure internal authentication at the endpoint. You will receive both the authorization and access tokens upon selecting the Secret.
- Key/Value
- Add a Name.
- Add the Key and Value.
- Add Expiration date (Optional).
Step 3. Click the 'Create and add' button.
Step 7. After registering the Toolkit with your Tools, you can go to the Agents section and choose from the Personal tab;
You don't need to select the entire Toolkit; the idea is to be more assertive by adding only the essential tools for your Agents. StackSpot AI recommends not using more than 20 tools.