StackSpot AI IDE Usage
StackSpot AI is a developer assistant. It suggests and helps you develop and get better codes. By utilizing the StackSpot AI platform, you can seamlessly install the extension into your integrated development environment (IDE) and engage with it to obtain answers enriched with higher-quality code.
Requirements
- StackSpot AI: Code Buddy is only compatible with:
- Visual Studio Code version 1.74.0 or later.
- JetBrains IDE version.
- Keep your IDE up to date.
Follow the steps below to download and use StackSpot AI
Step 1. Download the StackSpot AI Extension
Step 2. Access your IDE
This example is Visual Studio Code
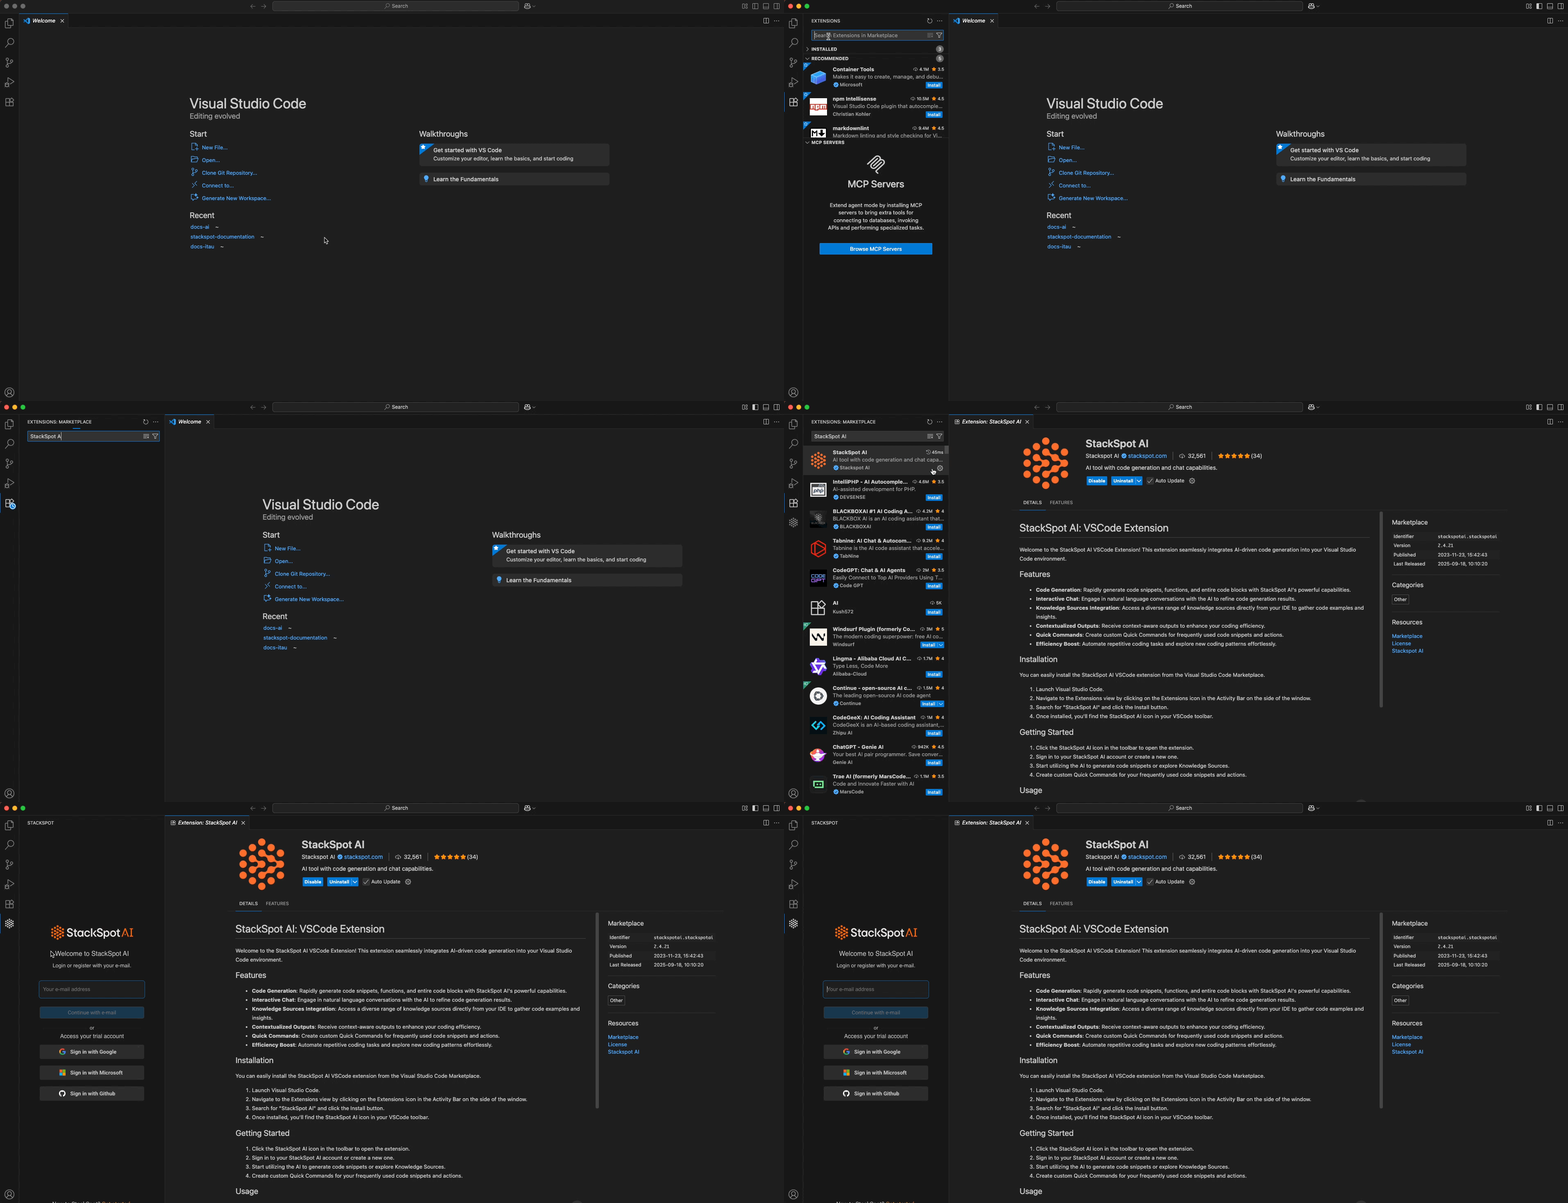
Then, on the left side, in the Activity bar, click on the extensions icon;
Step 3. On the upper search bar, search for 'StackSpot AI'
Click 'Install'.
See how to do it in the example below:
Step 4. Sign up or log in with your email address
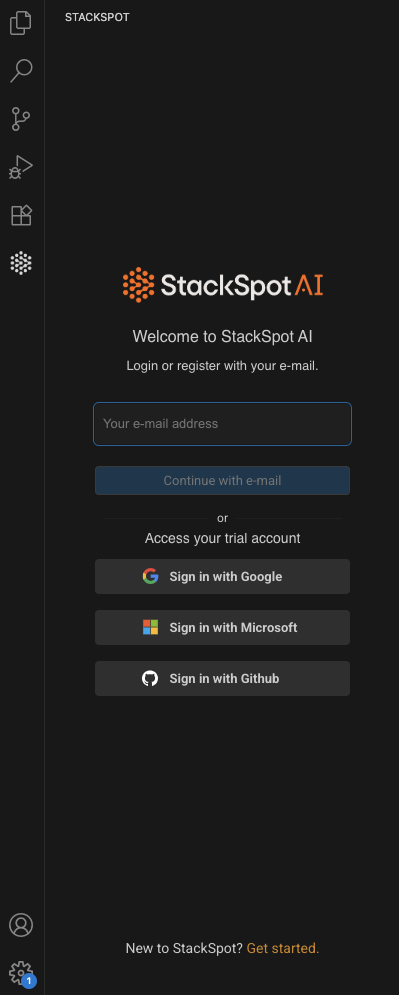
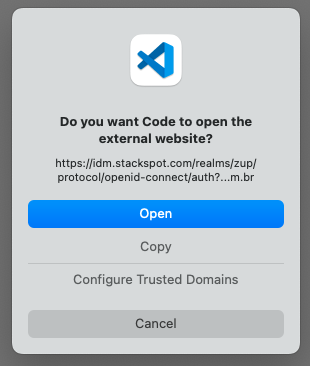
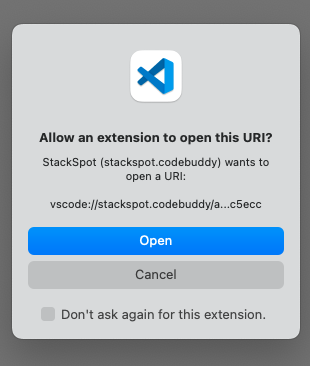
Follow the wizard’s instructions;
Step 5. You can start using the developer assistant
StackSpot AI IDE Resources
1. Project Indexing & Auto Complete
On the right corner, click on the ‘More Options button …’. You can index your project to add more context to the chat and activate the Auto Complete.
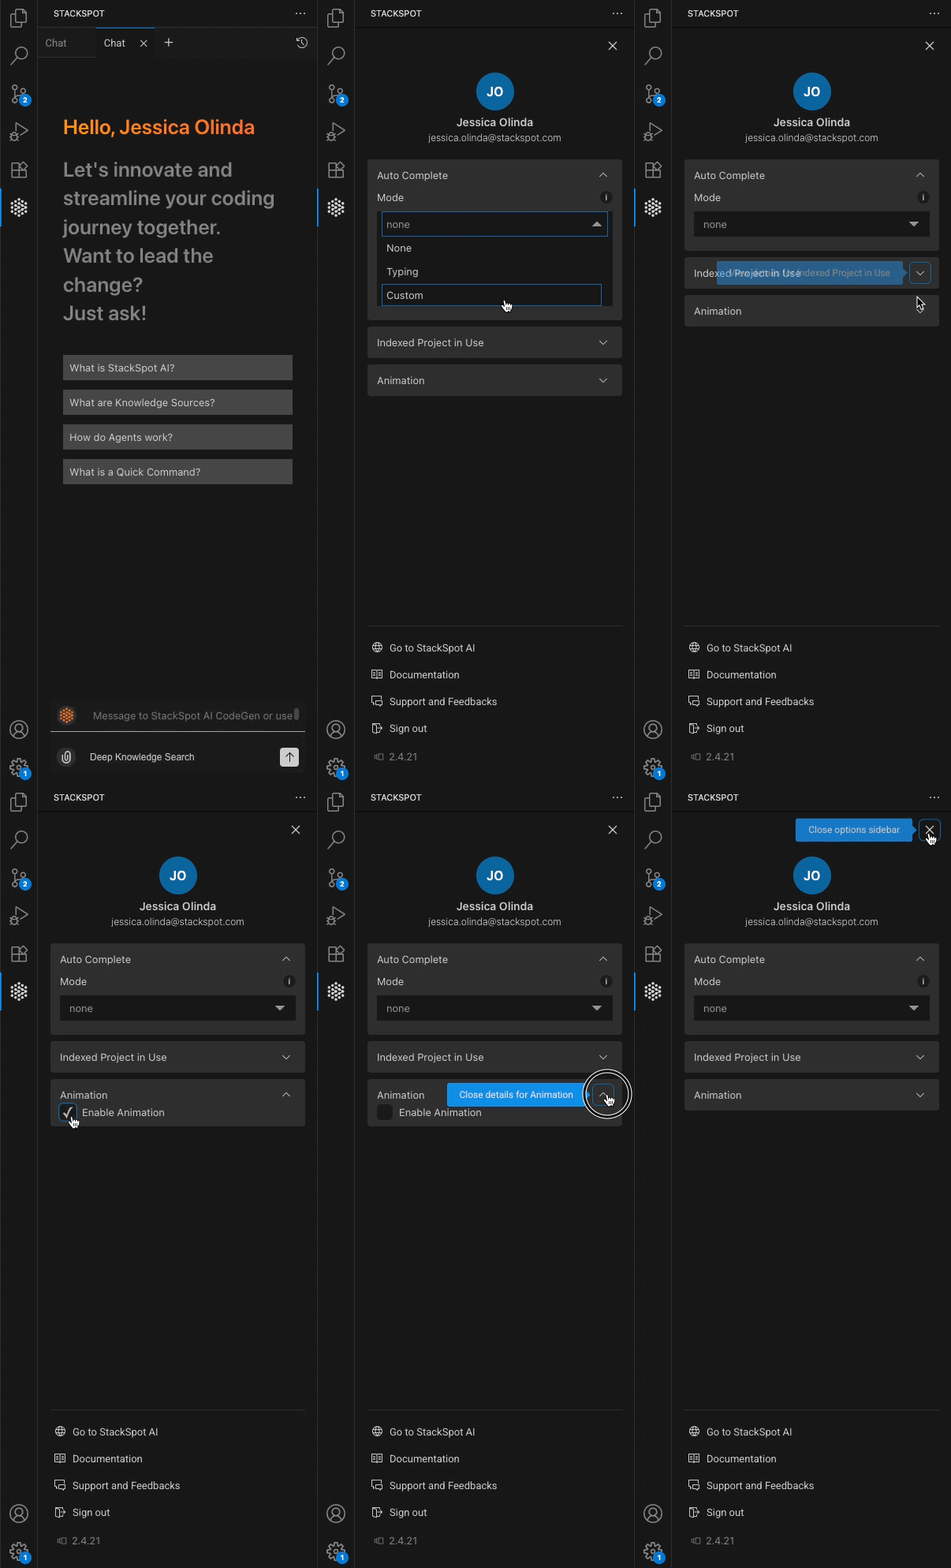
For more information, see the Project Indexing page
1.1 Animation
Activate this option to disable IDE animations, which can help prevent freezes and make your work environment more lightweight and responsive.
2. Buttons on the chat box
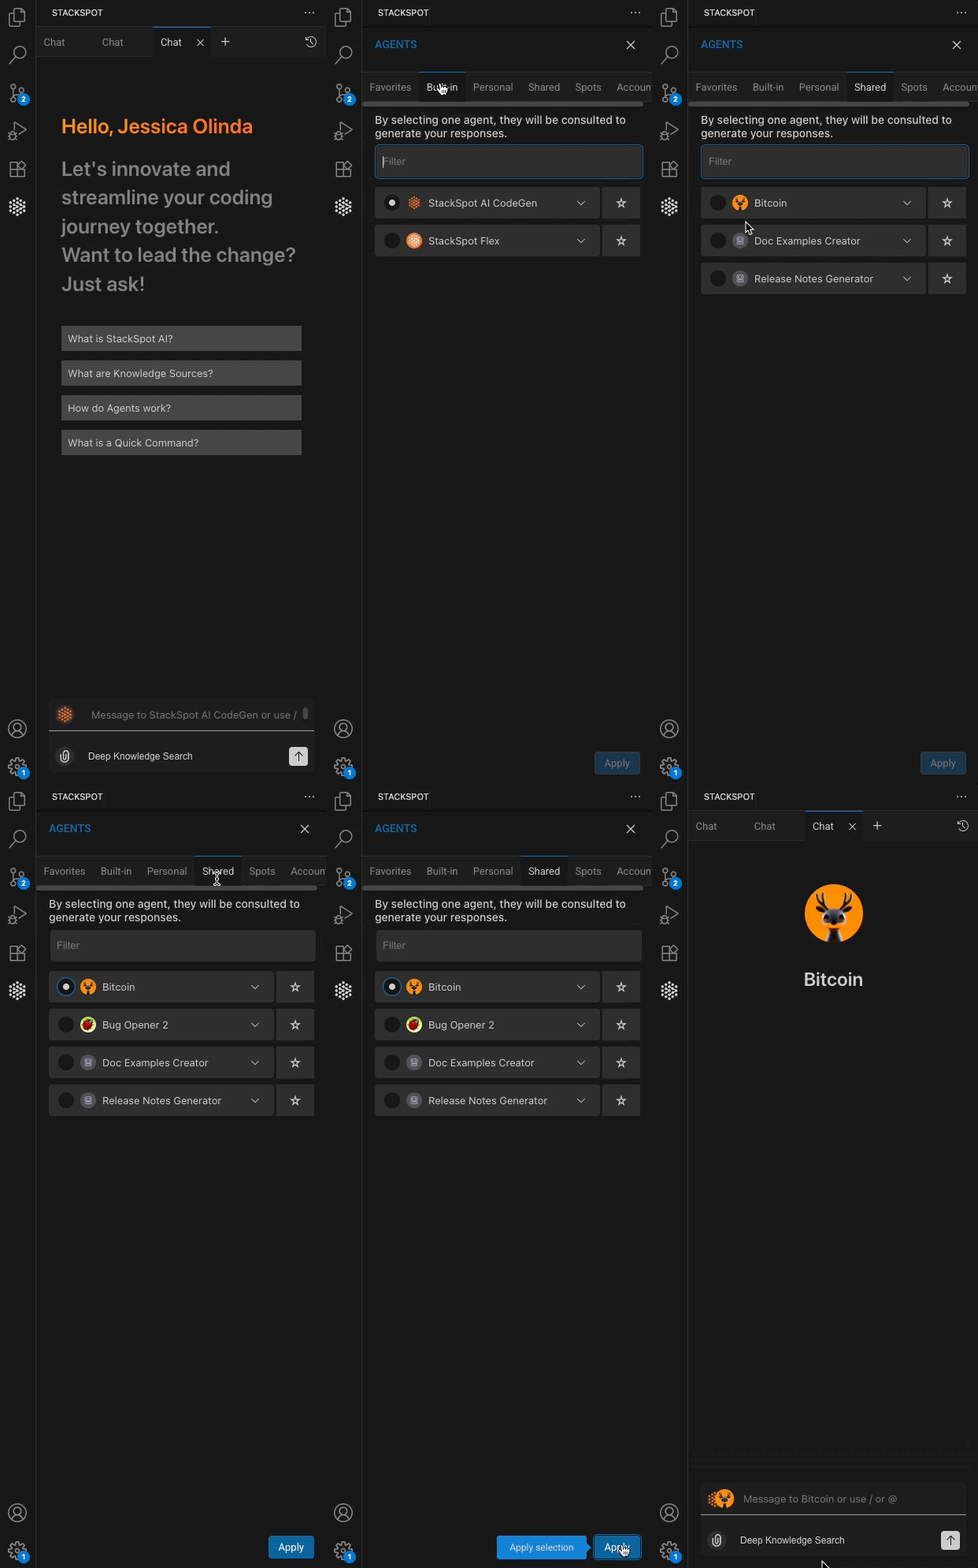
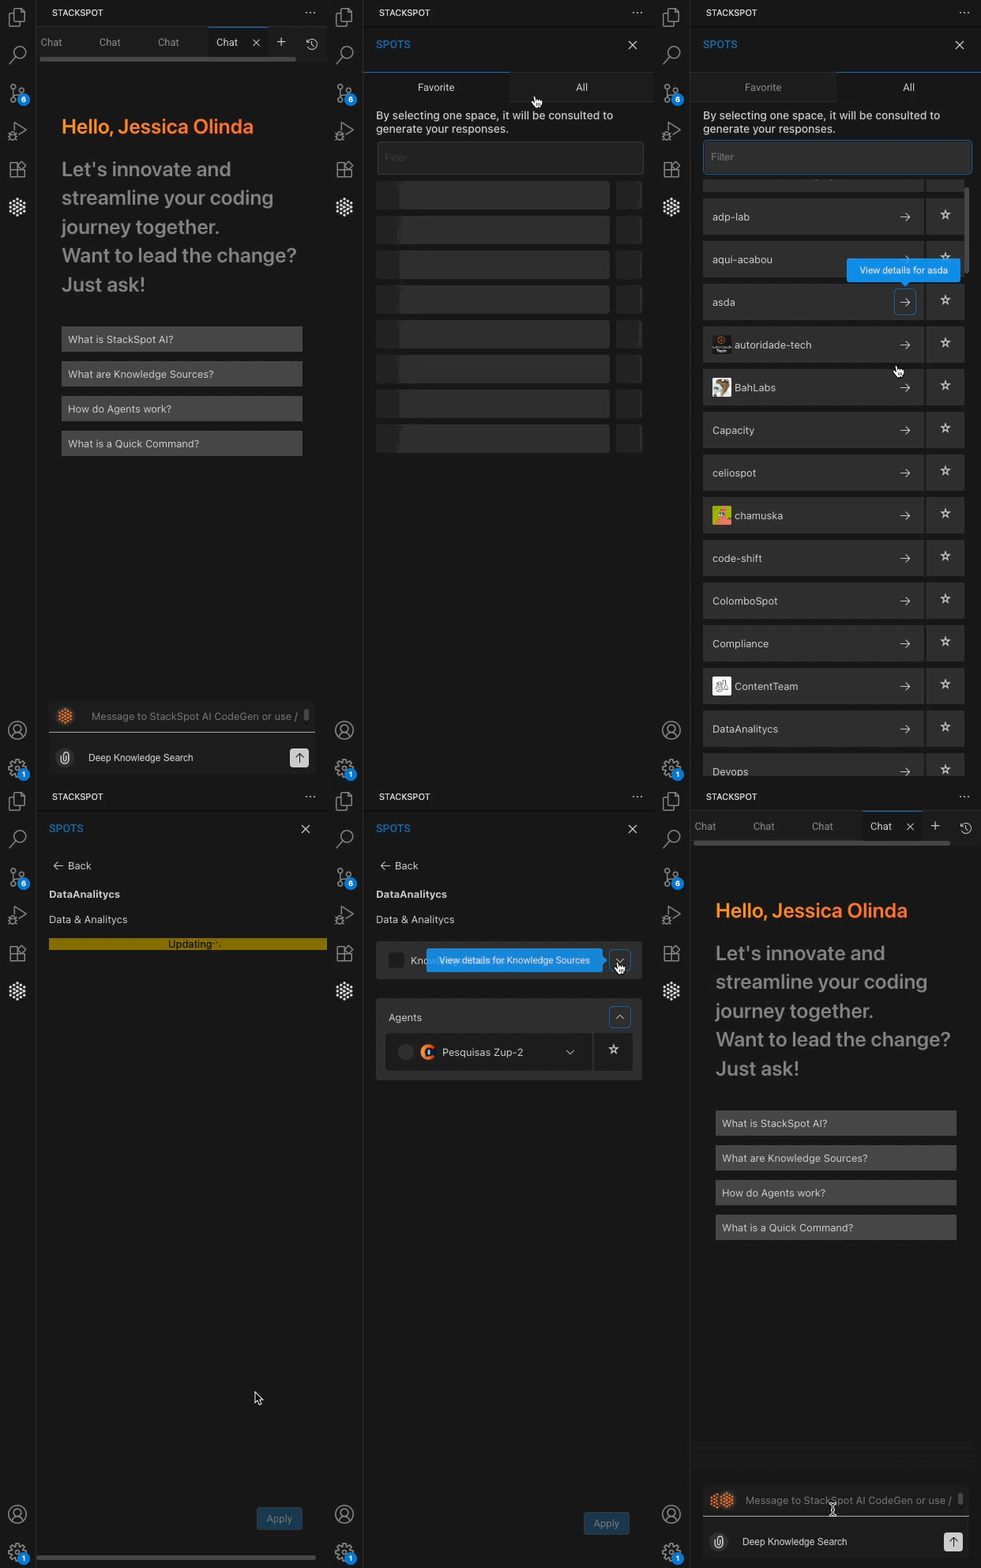
There are four buttons on your chat box for choosing Agents, Workspaces, Knowledge Sources and Stacks. StackSpot AI will use it to help generate your responses.
- Agents: Select only one Agent from the following options:
- Favorites: You can mark your Agents as favorites to have them appear at the top of the list.
- Built-in: StackSpot AI default Agents.
- Personal: The Agent you created.
- Account: Agent from your Account.
- Shared: The one shared with you.
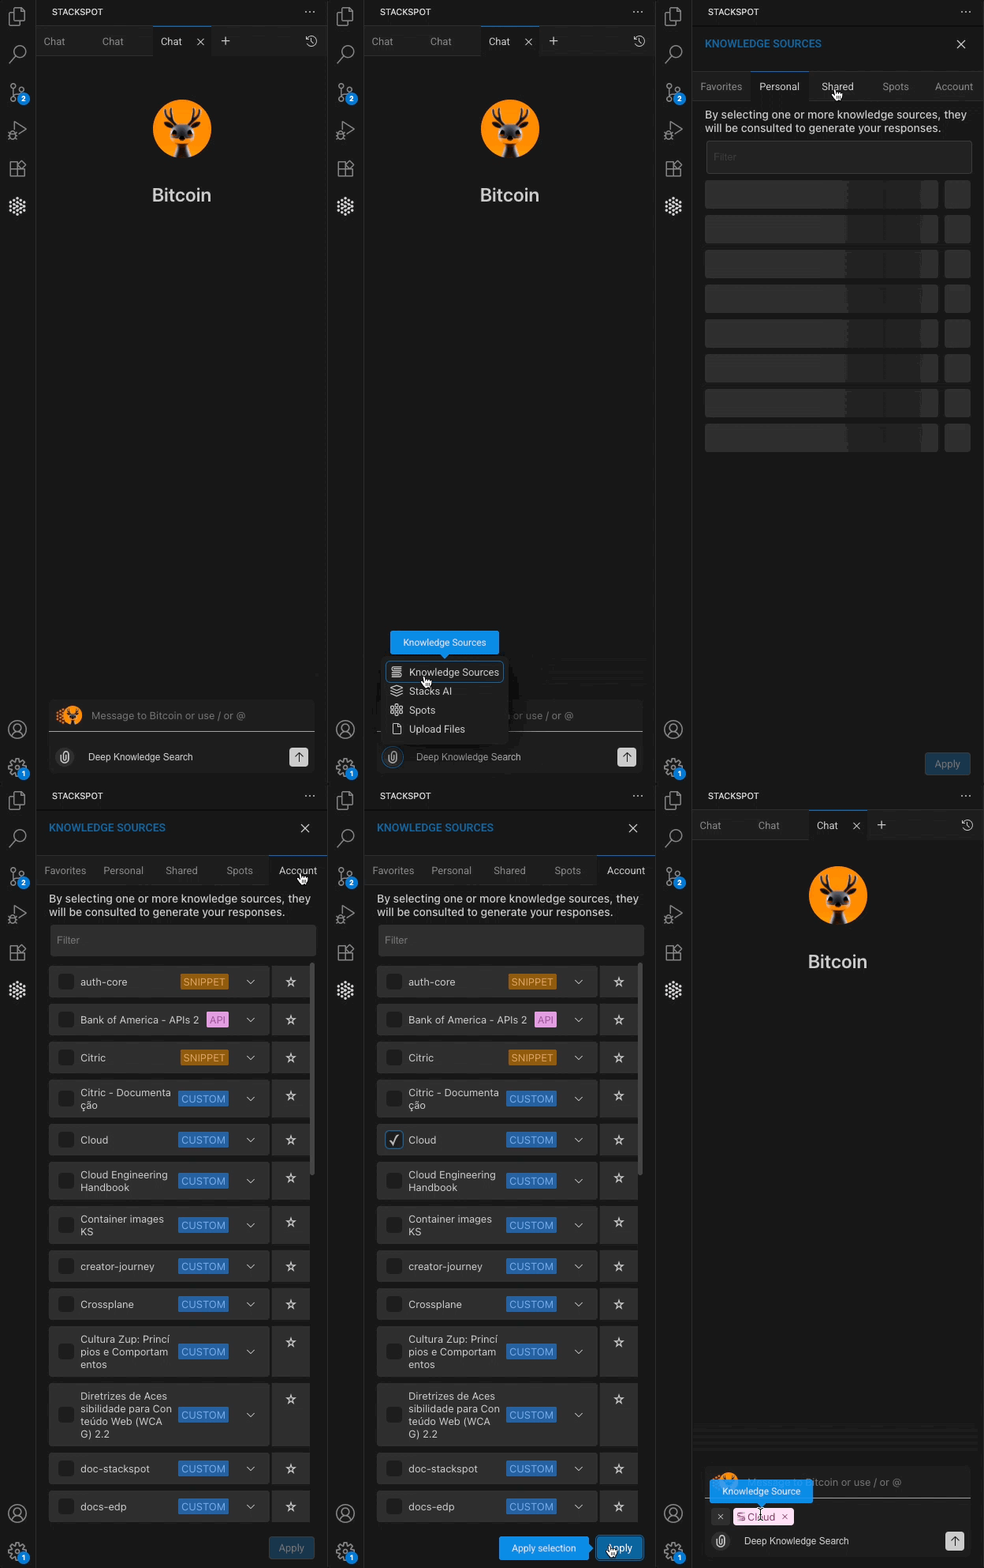
- Knowledge Sources (KS): You can choose one or more Knowledge Sources from the following:
- Favorites: You can mark your KS as favorites to have them appear at the top of the list.
- Account: The Knowledge Sources are available on your account.
- Personal: KSs you have created.
- Shared: KSs shared with you.
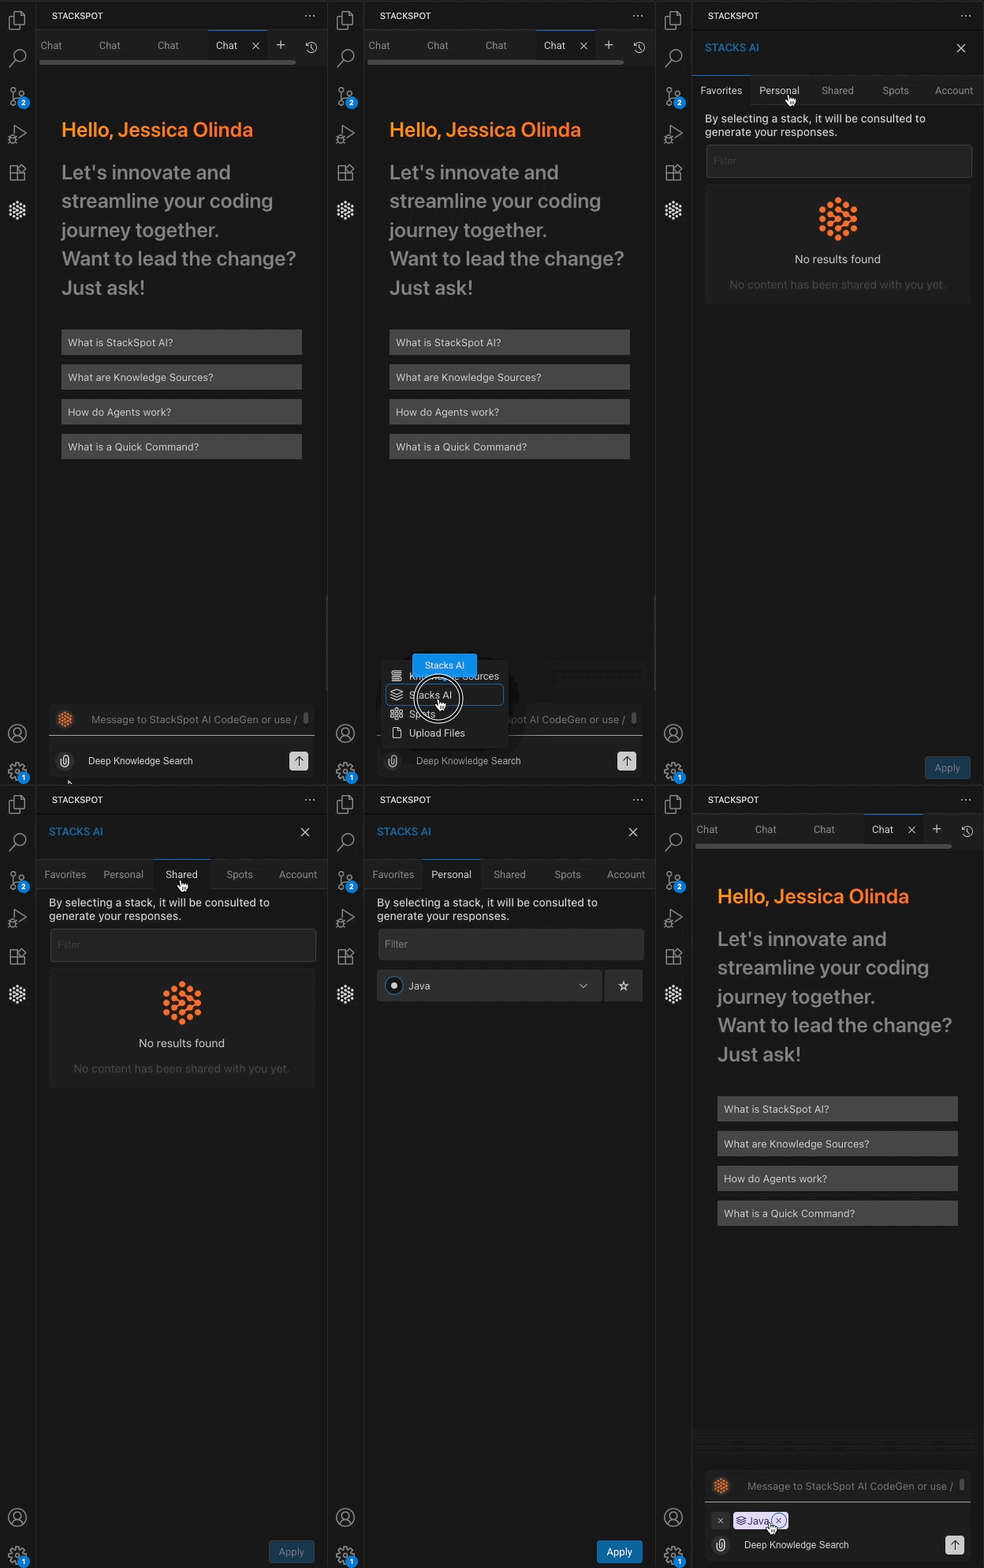
- Stacks AI: You can select Stack AIs from the Account, Personal, Favorites and Shared.
See an example below:
- Spots: You can access the Spots shared with you. Select Agents, KSs, and Stack AI from the shared Spots.
See an example below:
3. Creating a new chat
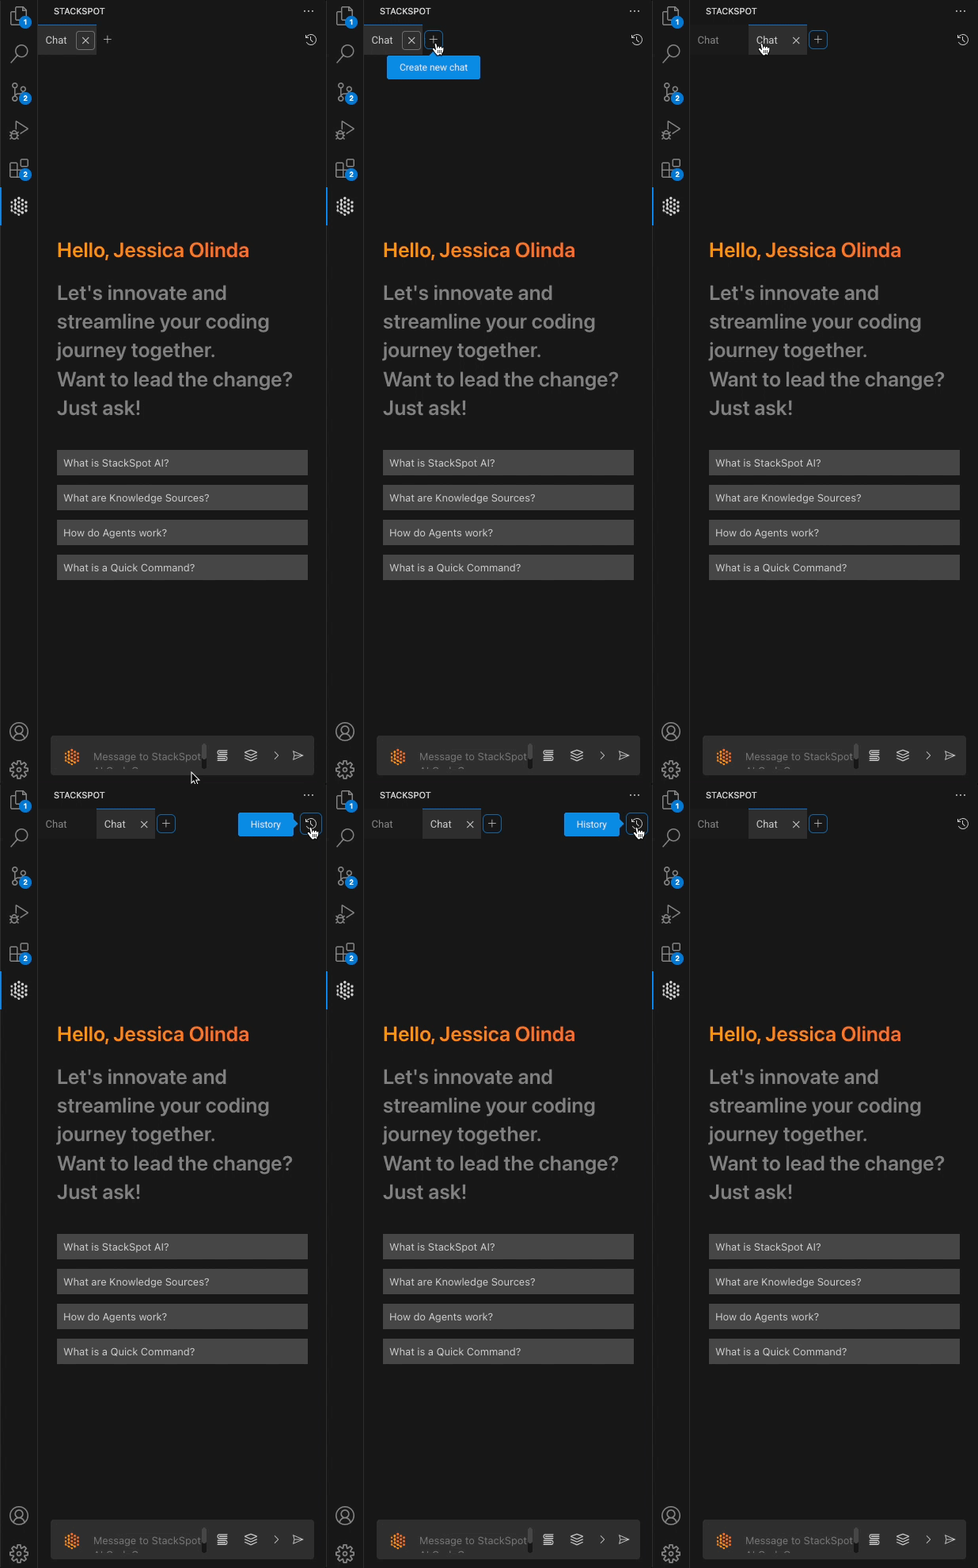
- To start a new chat, click the 'Add +' button on the top tab of your IDE.
- To view your past conversations, click the timer button on the screen's top right corner.
For more information, see the Chat History page
4. Use Agents
For more information, see the Use Agents page
5. Use Quick Commands
For more information, see the Use Quick Commands page
6. Use and Share Content (Quick Command, Knowledge Source)
For more information, see the Share Content page
Usage Example
See an example of how to use StackSpot AI on your IDE:
On your code project, write in the prompt:
- User: I want to generate a bank slip in my application
StackSpot AI: Thinking... StackSpot AI: To generate a bank slip in your application, you can use libraries or APIs depending on your programming language. Here are examples for popular languages:
API
POST /v1/charge
Authorization: Bearer {token}
Content-Type: application/json

{
  "items": [
    {
      "name": "Example Product",
      "value": 1500,
      "amount": 1
    }
  ],
  "payment": {
    "banking_billet": {
      "expire_at": "2024-07-01",
      "customer": {
        "name": "Customer Example",
        "cpf": "98765432100"
      }
    }
  }
}